Points to note for "Plates" in the "Packaging" or "Sheet Optimization" mode
For packaging jobs, it is also possible to load several plate templates in order to load and optimize different cutting dies on the related press sheets.
For that reason, you can load more than one plate template for "Packaging" and "Ganging Optimization Packaging" jobs in the "Plates" step.
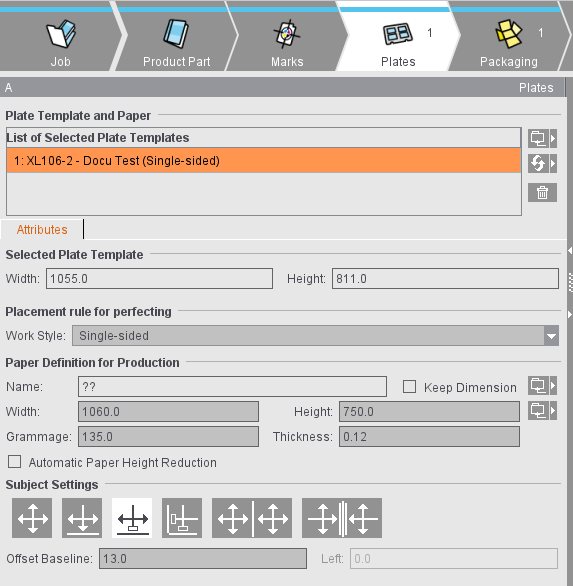
In the lower part, "Subject Settings" is added to the setting options for the plates. This is where you can set the positioning for the plate template selected in the table. This setting is used as the default when creating press sheets.
Automatic Paper Height Reduction
Prinect Signa Station automatically calculates the maximum paper height required of each resulting press sheet.
•"Ganging Optimization without Layout Default": according to the settings, the paper height is reduced automatically to the subject plus set margins.
•"Packaging" and "Ganging Optimization Packaging": the paper height is reduced to make the subject with all the marks fit on the paper and to avoid collisions with press sheet marks.
•Use of sheet paper: In this case, the paper height is trimmed before printing. Possible field of application: Produce more unprinted waste and not printed waste.
Subject Settings (positioning of the cutting dies)
The settings for the positioning of cutting dies are kept permanently. This allows the positions of the cutting dies to be restored automatically after changes to the job (e.g. change in paper size).

|
Manual positioning There is no automatic mechanism for the positioning of the cutting dies. This condition is also valid whenever the position of a cutting die is edited manually, either by entering a value in the text box or by moving the cutting die in the graphic view. The data of the user interface elements below the table refer to the cutting die selected in the table above. Only if all the selected cutting dies have the same values do these also display. If the values differ, elements remain empty. |

|
Centered horizontally and vertically on the paper All the cutting dies are distributed evenly in each direction and centered as a whole to the paper or half of paper. If this is not possible because there is not enough space, then the cutting dies are arranged one below the other and centered to the paper or half of paper. |

|
Centered horizontally on the paper and vertically on the gripper margin |

|
Centered horizontally and positioned vertically with a variable offset to the lower paper edge |

|
Positioned horizontally with a variable offset to the left paper edge and vertically with a variable offset to the lower paper edge |
|
|
In the following two variants, the paper is cut through the vertical center: |

|
The cutting dies are centered horizontally and vertically on both halves of the paper |

|
The cutting dies are centered horizontally on both sides of a "virtual" gripper margin and vertically on both halves of paper |
|
|
The "virtual" gripper margin is an imaginary area if the paper would be cut through the vertical center and a gripper margin would be applied to the resulting cut edges. The cutting dies are positioned on both sides of the "virtual" gripper margin. |

Note: See also examples for positioning in Positioning of Cutting Dies Depending on Work Style and Margin