You will find several video tutorials on automarks sets and their rule-based control in "Video Tutorials Signa Station".
So far in the Preferences, you could only define which automarks are to be used when creating a new job. It was not possible to set anything else. As of version 2021, automarks are saved as resources. This has the following benefits:
•The specific settings that were possible so far only in the job for the single marks can now be filed as a predefined resource using the automarks set.
•In the job, you only have to select the automarks set resource you want in "Automarks Set". Job-specific changes still continue to be possible.
•Such changes to the automarks set can be saved as a resource directly from the job and reused in later jobs.
•Because the automarks set is now a separate resource, you do not have to create additional product part templates to save these sets like you used to do.
•In the Preferences, the three possible configurations for the "Imposition", "Montage" and "Packaging" work modes are now no longer set by default in the "Resources" tab but only the resource you want, making changes easy to make. The "Marks" tab was dropped from the Preferences.
•By adding rules to the single automarks, you can automate the placement of automarks and control their placement on specific folding sheets.
At present, three different kinds of automarks sets are available:
•Automarks Set Imposition
•Automarks Set Packaging
•Automarks Set Montage
In addition to these automarks sets for the placement of marks relating to folding sheets and pages, you can also define automarks sets for placement relating to press sheets (independently of the work mode).
Conversion of old configurations
When the new Prinect Signa Station first starts, the old automarks configurations from the Preferences are converted to automarks sets. These are filed in the "Converted" subgroup in the resources. In this process, a resource is created for each of the three work modes, beginning with "Converted-".
If the converted resource matches a standard automarks set, then the standard automarks set used and no "Converted-" version is created.
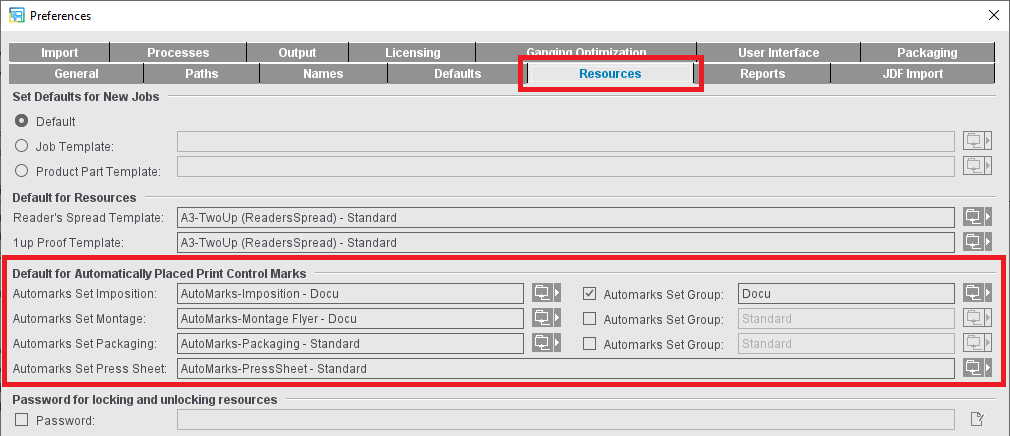
Defaults
In the Preferences, the automarks sets to be used by default when creating new jobs are selected in the "Resources" tab in "Default for Automatically Placed Print Control Marks". The "Marks" tab in the Preferences was dropped, likewise the related table in the "Packaging" tab.
Use in the job
For a job, there are three ways to use automarks:
•Use of the configuration set as the default for the work mode concerned in the Preferences (automatically with new jobs created)
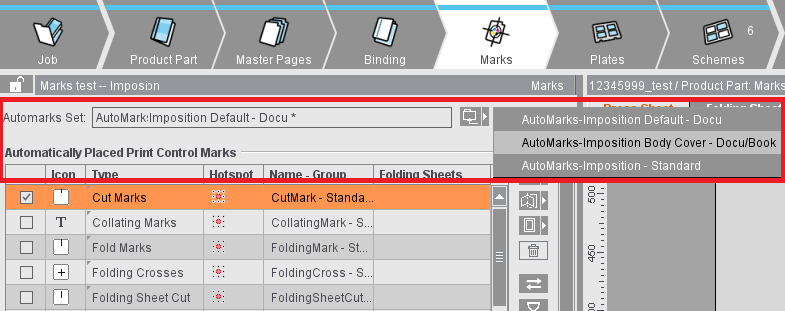
•Selection of a predefined automarks set using the folder button beside the "Automarks Set" box in the "Marks" step.
•Job-specific setup of each of the print control marks in the table in the "Marks" step (is saved as an internal resource)
Create automarks sets as a resource
The Automarks Set Editor is used when creating and editing automarks sets in the Resources (see Automarks Set Editor).
As an alternative, you can also save automarks sets that were created within a job to the general Resources using the Save button and, by doing so, make them able to be reused.
Rule-based application of different automarks sets within a job
Up to now, it was not possible within a product part to use different automarks configurations (e.g. for cover and body or for different customers). To make this possible, rules were added to the automarks sets.
You can create and edit rules in the automarks set resource and also in the job.
Benefit: This makes it possible to create automarks sets that take into account all possible cases. When you select this automarks set as a default for new jobs, the set you want is selected automatically during job processing, making manual intervention no longer necessary.
You can use an automarks set as before, or you can add all automarks sets of a resource folder to the product part and assign them rules. In the "Marks" step, you can also manually assign automarks sets of other resource folders to the job.
Details about automarks sets and working with rules:
•Automarks Sets (Resources)
To have a better overview of which automarks sets are used for a specific folding sheet, the following features were added to the display:
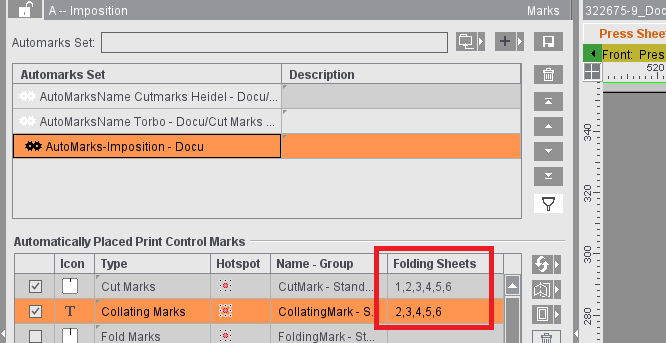
•In the "Marks" step, the table of automarks sets also has a "Folding Sheets" column that contains a list of all the folding sheets that use this automarks set.
•Using the filter functions, you can confine the display to certain automarks or automarks sets (only enabled marks, only sets used in the current job; see Overview of the button functions).
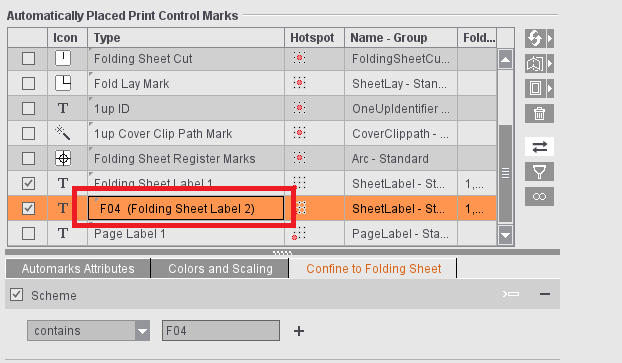
•Because each automarks set can have multiple labels, it can be a good idea to customize their names, for example, with regard to a rule you will use. To do this, simply click the "Type" box and enter a name. The original type name is added to the end in parentheses.
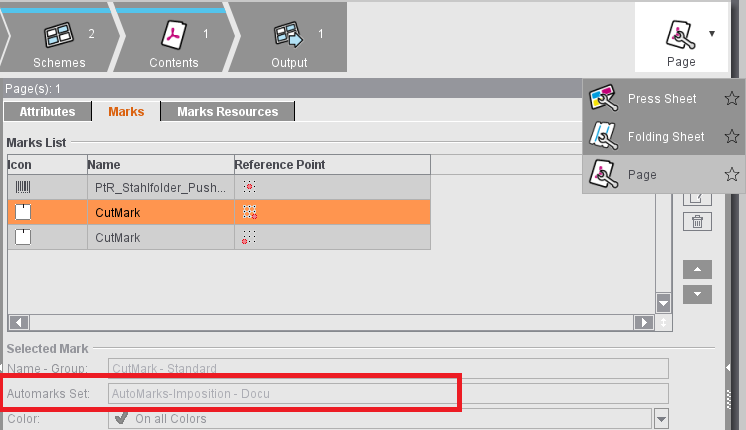
•The automarks set used and its description display in the Folding Sheet Inspector and the Page Inspector.
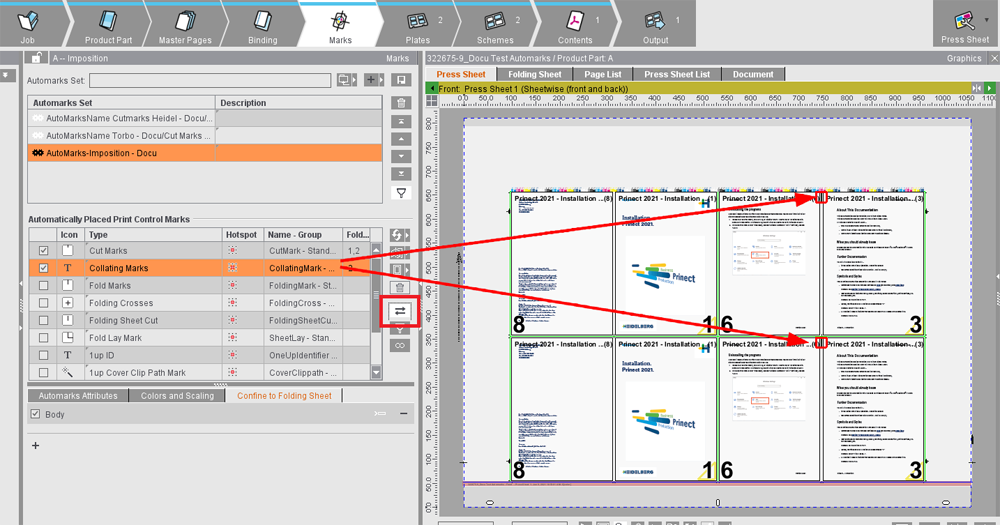
•In the graphic view, you can highlight all occurrences of an automark selected in the "Marks" step if needed.
Editing Automarks in the Graphic View
Up to now, you could set up automarks only in the automarks user interface, in other words in "Automarks" in the "Marks" and "Plates" steps. Until now, it was not possible to position the marks with visual control in the graphic view.
The positioning of marks placed by automarks in the graphic view with visual control is becoming more and more important because with the press sheet automarks sets an increasing number of manually placed marks are being used as automarks. For that reason, you can now manually reposition placed marks of certain automarks types in the graphic view.
Automarks that you can edit in the graphic view have a magenta-colored frame when you click them to make it easier to tell them apart from the manually placed marks (orange frame) and uneditable automarks (red frame).
This feature is available in both the job and the graphic view in the Plate Template Editor when "Use Automarks Set" is enabled.
See Editing Automarks in the Graphic View for details
Conversion of Manually Set Marks to Automarks
To use a manually set mark as an automark in the resources in the future, you can convert the mark directly in the graphic view.
To do so, select the mark to convert and choose "Convert mark to automark". The context menu is available in the Press Sheets view and the Folding Sheet/Assembly Block/Cutting Die view.
See Convert manually set marks to automarks for details

Important: All marks must be used as automarks so that they are also set after a new optimization. Manually set marks can be converted to automarks for this purpose. However, this is possible only for plate-related marks if the corresponding plate template also contains an active automarks set, otherwise an error message appears. In the case of marks related to cutting dies or 1ups, these are added to the corresponding automarks set.
Automarks Sets for Folding Machines TX96 and TH-KH82-P
For Stahlfolder TX96 and TH-KH82-P, the barcode marks must be placed at different positions, depending on the scheme used in each case. It would involve much time and effort to manually place these. Six new automarks sets are available in the default automarks sets. For both folding machines TX96 and TH-KH82-P, there are three possible positions in each case where the barcode can be set. The following automarks sets are available accordingly:
•TH-KH82-P-PositionA
•TH-KH82-P-PositionB
•TH-KH82-P-PositionC
•TX96-PositionA
•TX96-PositionB
•TX96-PositionC
For their use, you should copy the matching automarks set (folding machine and position) to the resources group that is specified in the Preferences in "Resources" for the "Imposition" mode.
Extension of press sheet automarks sets by print quality control bars
The print quality control strip specifies a content-free area in which downstream procedures can perform print quality tests (for example Nozzle test on digital ink presses) and can also be used as an automark.
See Print Quality Control Strip in "Automarks" and the general description in Print Quality Control Strip.
Polygonal clipping path for automarks
In the case of automarks, it was previously only possible to specify a margin. A polygonal clipping path could only be specified for manually set marks. If manually set marks with a polygonal clipping path were converted to auto marks, the clipping path was removed. However, this is particularly useful and necessary in the packaging mode.
Now the manually set polygonal clipping path is also transferred to the auto mark when converting.