Prerequisite: This tab is available only for toner-based digital presses, but not for Heidelberg inkjet digital presses (Primefire, Labelfire).
This tab is where you specify how the single document pages will be placed on the sheet layout. You can use the page size of the original document or assign a fixed page size. You can also define a section as required.
"Plate Size" parameter

Prerequisite: This option is available only for the "Digital Platesetter" device type.
This is where you set the size of the plates used in the CTP device (in mm).
The paper or substrate you select defines the maximum size of the sheet layout. You select the substrate from the "Paper" list. The "Width" and "Height" fields show the pre-defined dimensions of the paper.

Note: The "Digital Printing" step is correctly configured only when suitable substrate dimensions are entered in the "Width" and "Height" boxes. The dimensions are determined by the substrate you selected (see also Printing Materials and Substrates). The following is valid for sheetfed digital presses: The sheets shown in the layout section display in the orientation that the sheets have on the press, as seen when standing in front of the press. Then the sheets run through the press from right to left. Accordingly, the "Width" value refers to the dimension of the paper in the direction of travel and the "Height" value to the dimension of the paper perpendicular to the direction of travel.
You can select "User-defined" as the paper grade for "Generic" (i.e. no concrete press is specified) and "Platesetter" (CTP device) device types. You can then use the "Width" and "Height" boxes. Because these device types do not provide you with any information about the planned or loaded paper sizes, you can use these boxes to manually set the width and height of the paper sheets for these device types.

Prerequisite: The Cover function is available only for Heidelberg Versafire EV/CV and Versafire EP/CP presses.
You can use a different type of paper for the cover than for the body of the print product if you enable this option. Select this paper in the list box beside it. Only substrates whose sizes fit the substrate set in the "Paper" list box display for selection. The same substrate is set by default for the body and for the cover.
Selection of different paper grades for cover and back
When you click the plus sign beside the list box, a second list box displays. You can now select a paper grade for the cover in the top list box and another paper grade for the back in the lower list box. Appropriate symbols display to the left of the list boxes.
Definition of blank cover pages
The "Leave cover pages blank" option lets you define single pages as blank pages for the outer and inner pages of the cover (Front = cover, Back = back). In this way, you can, for example, define the inner pages of the cover as unprinted blank pages. This can be helpful if the cover pages in the PDF document are not defined with blank inner pages.
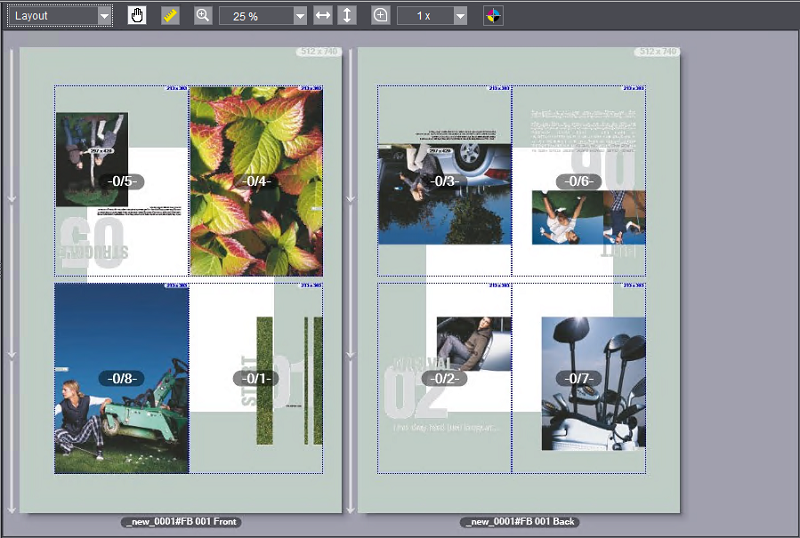
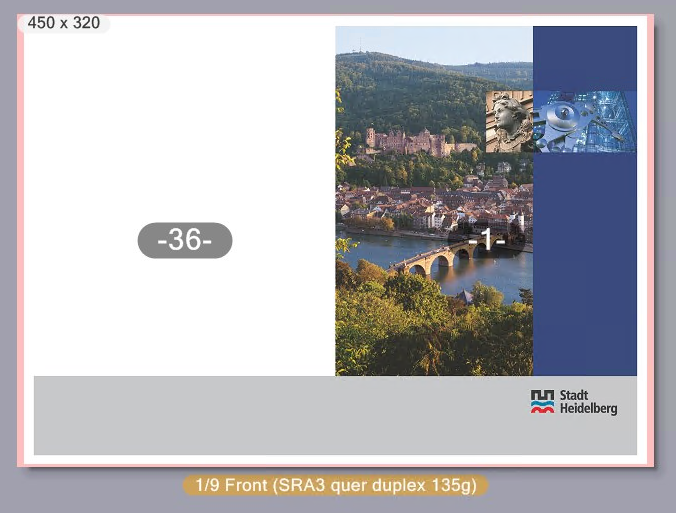
If "Cover" is enabled, the cover pages are highlighted by a dark yellow label (instead of a gray label) in the page preview:

Note: In this connection, a "page" is always a complete surface of the substrate, i.e. the front or back of a paper sheet.
The cover pages defined are different depending on the layout type that is set (see Selection of the layout type):
•Saddlestitching: The first sheet is defined as the cover sheet.
•Perfect binding: The first and the last sheet are defined as the cover sheet.

Prerequisite: Before you submit a print job with special cover pages to the press, make sure that the paper planned for the cover is available in the press.
The same paper is used for all pages if "Cover" is disabled.

Note: The output profile for color management that is set by default for the paper grade set for the cover is used for covers that will be printed on a different paper to the pages of the body. This is the profile that is used in the color management options when "Automatic Selection by Paper Type" (see "Automatic Selection by Paper Type" option) is enabled. In the "Color settings" tab, you can set a custom output profile for the paper grade that is set for the pages of the body (see "Other Profile" option).
"Horizontal center" option

Prerequisite: This option is available only for the "Digital Platesetter" device type.
When this option is disabled, you can set a horizontal offset (left box) and a vertical offset (right box) between the plate reference point and the paper sheet reference point. The reference point in each case is the bottom left corner of the plate or sheet. These offsets display in the preview immediately after you confirm the input.
In contrast to the subject offset where you set the offsets of the subject compared to the paper sheet, you set the offsets of the paper sheet compared to the plate with this option.
When you enable this option, the paper sheet is centered horizontally on the plate. The box for setting the horizontal offset is dimmed. You can still modify the vertical offset.

Prerequisite: This option is available only for toner-based digital presses (e.g. Versafire CV/CP or EV/EP).
You can set up a margin that will not be printed using this option. This can be a good idea for some jobs, for example, where logos or business cards are not to be printed right up to the edge of the paper. You can set the non-printing margin either the same for all four pages or differently for each page on the paper sheet. You can show or hide the non-printing margin in the preview using "Show > Non-Printing Margin" in the context-sensitive menu.
"Subject Offset (manual)" option
The subject offset is different, depending on whether sheet or web material is to be printed:
•For sheet material, the sheet reference point with coordinates (0,0) is the bottom left corner of the sheet. This means that subject offset is the distance between the bottom left corner of the subject and the reference point.
•For web material, subject offset is the left offset (in feed direction) of the printed content to the paper edge.
The subject is automatically centered in horizontal and vertical direction if the options for "Subject Offset (manual)" are not enabled. This is the default setting. If one of the options is enabled, there is no centering for the X or Y direction concerned and the set subject offset, i.e. the offset of the subject to its reference point, is applied. If the second direction stays disabled, the array in this direction is centered.
There is no automatic centering if the options for both directions are enabled. The defined offset of the subject to its reference point is set for both directions.
Placement of the objects and display in the preview window are matched automatically to the setting and, consequently, the objects of the subject are positioned on the substrate as defined in the settings.

Note: The grain direction of the substrate in the press is indicated by arrows in the preview for Labelfire digital presses (web material) or Primefire digital presses.