Privacy Policy | Imprint | Prinect Know How | Prinect Release Notes ![]()
In order for Analyze Point to be able to correctly evaluate and analyze the jobs produced, the following must be observed in the machine configuration:
If the "Printing only with reference to a job" option (available from version S07B) is enabled on the press, the following conditions must be met before printing can begin:
•A job must be loaded on the press.
•The start of the printing operation is reported to Analyze Point.
•The "Print" operation is started.
The print operation is therefore only started when the start of the job has been reported to the Prinect workflow. If the "Printing only with reference to a job" option is enabled, a job can no longer be printed if the job has been interrupted or ended.
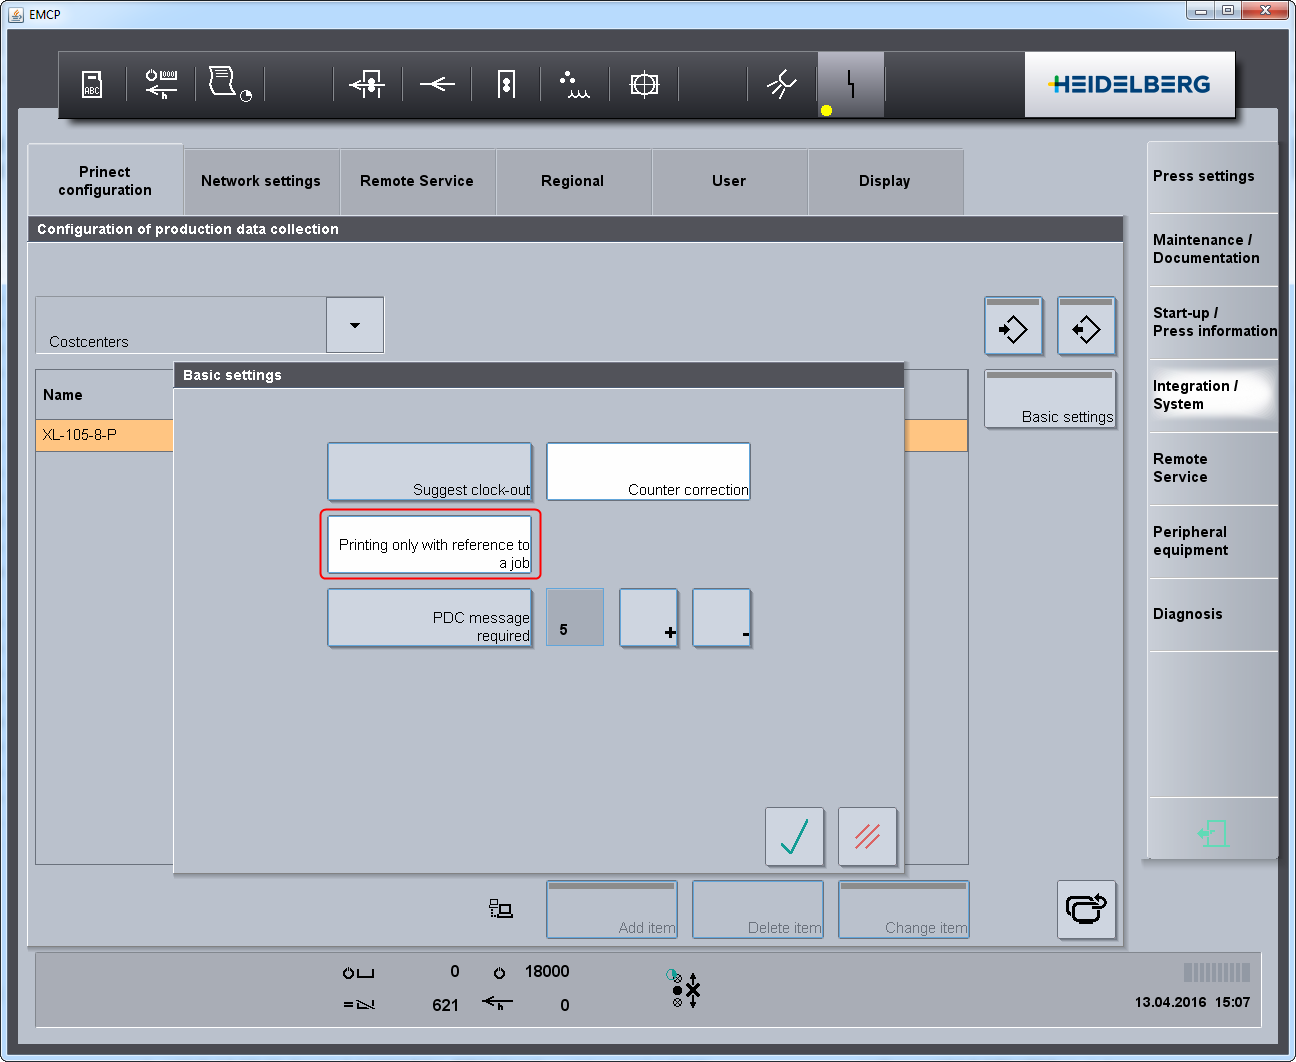
The figure below shows how to enable the "Printing only with reference to a job" option. In the Prinect Press Center, switch to the "System > Service > Integration/System > PDC Configuration > Basic Settings > Print only with reference to a job" view.
•When you create the press in the Device Assistant, you assign the previously defined operation groups and thus the associated operations (PDC messages) to the press. When you define an operation (PDC message), you can configure the following properties for the "Job information" attribute:
•If the operation (PDC message) is only to be activated on the machine when a job is loaded and when the PDC message for starting the job has been transmitted, the "Job information" parameter must be set to "Required".
•If the operation (PDC message) is only to be activated on the machine when no job is loaded, the "Job information" parameter must be set to "Without".
•If the operation (PDC message) is to be activated both with and without a loaded job, the "Job information" parameter must remain "empty", i.e. no value is set.
This means that for all operations (PDC messages) affecting the production times, you need to set the "Job information" attribute to "Required". A detailed description can be found here: Create or edit a new action (PDC Message).
The following rules apply for operating the system:
•Before production can be started, a new printing operation must be started with a corresponding PDC message.
•The job counter must be reset to zero each time a new job is confirmed. Otherwise the new job starts with the job counter of the previous job.
•Once the desired quantity has been reached on the press, the counters must not be reset to zero before the "End" PDC message for the job has been sent to the Prinect workflow. The counters must only be reset to zero when a new job is started.
Privacy Policy | Imprint | Prinect Know How | Prinect Release Notes