Privacy Policy | Imprint | Prinect Know How | Prinect Release Notes ![]()
In the main menu, you can access functions that are not available in the individual views of the user interface or that you can use to toggle the views. The main menu contains the following submenus:
•Program
•Extras
•Language
•Help
Logout | You will be logged out of the PMC. To log in again, you must enter your PMC username and password. |
Restart | The PMC is restarted, i.e. the user interface is closed, and the services required for operation are stopped and restarted. After the command is invoked, you must confirm the restart. After the restart, you will need to log in to the PMC again. |
Normally, searching for new software takes place once a day at a specific time. This command triggers the immediate search for new software. An appropriate request is sent to the PSC. If new Prinect software is found, it is downloaded and is then available for installation in the "Software Update" view. See Search for New Software. | |
The "Loaded Software" window opens. All software products or update packages installed in the Prinect system environment or that are to be installed are displayed. See The "Loaded Software" window. | |
The "Data Transfers" window opens. All update packages that are currently being downloaded are shown here. When a download is complete, it is no longer listed in this window, but the downloaded software appears in the "Loaded Software" window. See The "Data Transfers" window. | |
The "Licensing State" window opens. Here you will find a license overview for the installed Prinect components. This window is useful if there are problems with the licensing state. If necessary, you can extend the operating license of non-functioning licenses. See The "Licensing State" window. | |
Starting the connection test | With the connection test you check the status of the HEIDELBERG Connection. You can also start the connection test in the "Administration > HEIDELBERG Connection" area. See HEIDELBERG Connection test (6). |
The "Send Message" window opens. Here you can enter a text message and broadcast it to selected computers in the Prinect system environment. See The "Send Message" window. | |
Download HTTPS certificate | You need so-called "certificates" separately issued for every HTTPS server to use the secure HTTPS connections. With this function, you can download the required certificates from Prinect Software Center to the local computer. See The "Certificate Management" window. Note: Trusted computers within the Prinect system environment will automatically install the required security certificate. See Trust (4). |
Load Media Set | This feature allows you to select available media sets and download them to the PMC repository. |
The "Loaded Software" window
This table shows all Prinect software that is installed and that is to be installed.
This window has the following tabs:
•All Packages
Controls
The following controls are available in the tabs of the "Loaded Software" window:
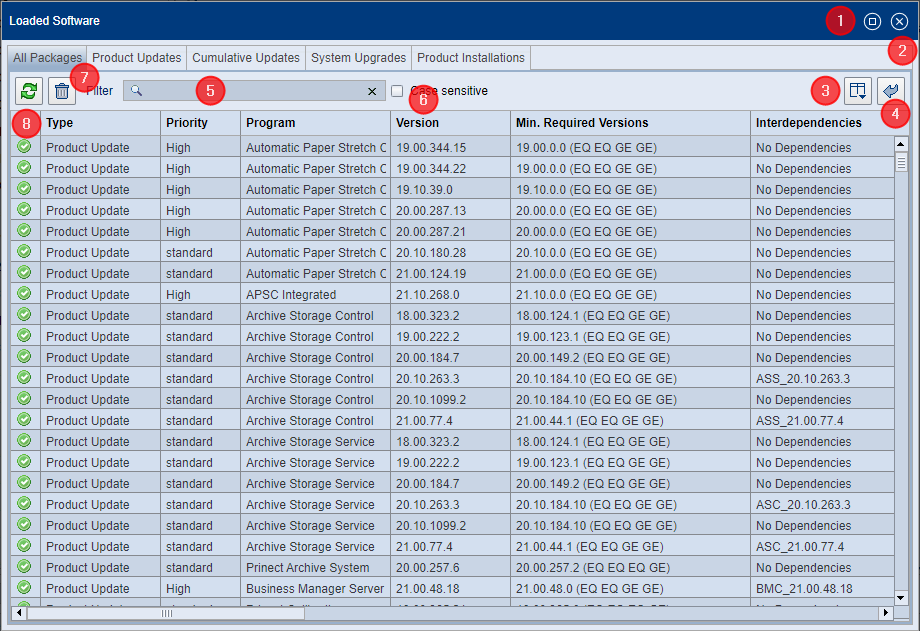
(1) Button "Enlarge window" | The window is enlarged to the full size of the browser window. Clicking the button again resets the window size. |
(2) Button "Close window" | The window closes. |
(3) Button "Select Columns" | A dialog opens where you can select the columns to be shown or hidden in the table. |
The original table layout is restored, which means that hidden columns are displayed again and columns that were not originally displayed are hidden. | |
(5) Search function | To quickly find specific table items, you can enter a string (letters and/or numbers). The entire table is searched immediately after the input. Items found are highlighted in color. Clicking the "x" will clear the search field, display the original table contents and reset the highlights. |
(6) "Case sensitive" option | With this option enabled, only those entries that match exactly the case of the text you entered will be found. |
(7) Button "Delete updates no longer needed" | If you click the table entry of a data package that is no longer required (marked with a recycle bin symbol) or an update package that is available for installation and then press this button, a dialog opens where you can select the packages to be deleted in the local Repository. |
(8) "Refresh view" button | The window content is refreshed. |
Changing the sort order of columns
You can change the sort order of the columns in the table by clicking the header of the respective column. Then a double arrow appears. If you click this double arrow, the sort order in the column is reversed, for example, from descending to ascending or vice versa. See also Change the table column order.
Changing the column position
You can change the position of a column as follows: click the column header, move the column to the new position within the header column while holding the left mouse button pressed, and release the mouse button when finished.
Deleting product installation or update packages
You can delete executable or no longer required update packages (tagged with a Recycle Bin icon) from the local Repository:
•Click the button "Delete updates no longer needed" (7) or
•Select the corresponding list item and use the context menu command "Delete Package".
This tab displays all update/upgrade packages and product installation packages. In the table (also in the other tabs of this window), the entries can have the following states:
| The Update Package is available and can be applied. |
| The Update Package was withdrawn and cannot be applied. |
| The update package is obsolete, which means it is no longer required and can be deleted. |
| The item is not required, for example, if the product was not installed until now and therefore no update is required. |
| The update package was not tested by the PSC and is tagged as "unknown". For example, this state can occur if update packages are imported locally via hotfolder. |
| The update package has not (yet) been downloaded completely from the PSC. |
Product Updates
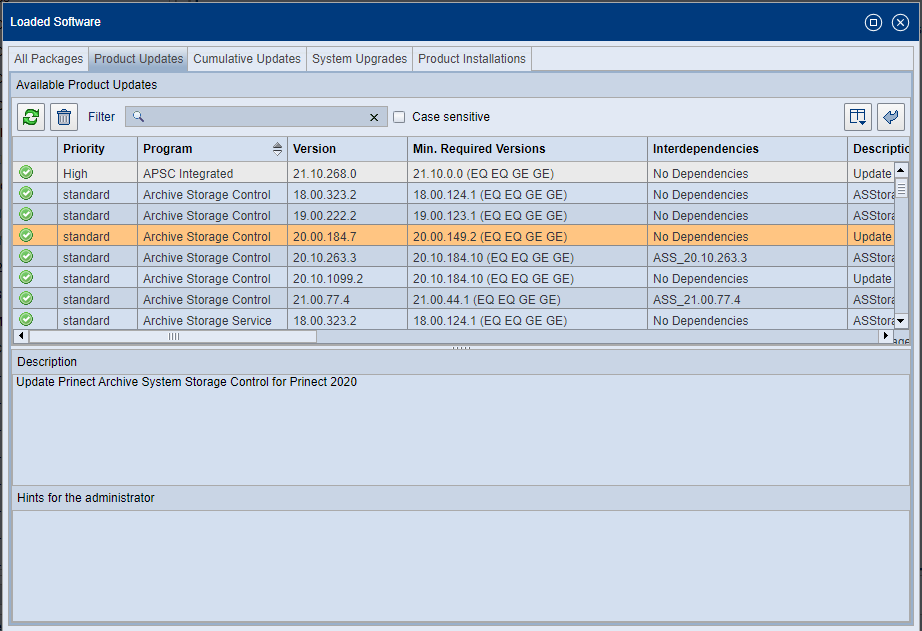
Update packages installed during product updates or available for installation are displayed here. The "Priority" column indicates the urgency of the installation for each update package. Update packages with priority "High" should be installed as soon as possible, otherwise a system shutdown could occur. Update packages with priority "Urgent" should be installed immediately — they fix security-related or production-critical errors.
In the lower part of the window you can find the "Description" and "Hints for the Administrator" fields. When you select an update, the corresponding information will appear in these fields. This can be useful if the information is too long to be displayed in the corresponding columns.
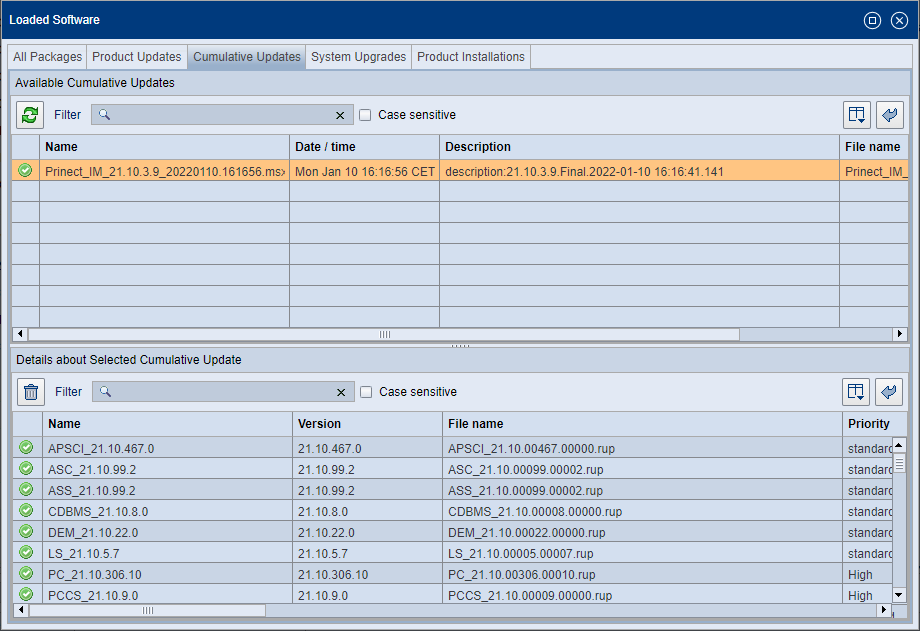
Cumulative updates represent groups of product updates compiled by HEIDELBERG. The interdependencies are automatically taken into account. In contrast to product upgrades, cumulative updates will not change the master version of the respective products. This means the base and target versions of the products are assigned to the same master version or year version.
You can install cumulative updates when they are in the "available" state (green dot).
"Available Cumulative Updates" section
Displays all cumulative updates available in the PMC or local repository. During installation, cumulative updates will receive the version defined in the "Description" column. This description — and not individual products — determines the update version.
"Details about Selected Cumulative Update" section
Displays information about the components (Remote Update Packages — RUP) of the respective cumulative update selected in the upper list.
System upgrades are updates to the master version of a Prinect software. Compared to a product update, a system upgrade is a very complex process, which is performed relatively rarely and has to be monitored by an operator. Unlike product updates for individual products, a system upgrade updates many products at the same time.
You can install system upgrades when they are in the "available" state (green dot).
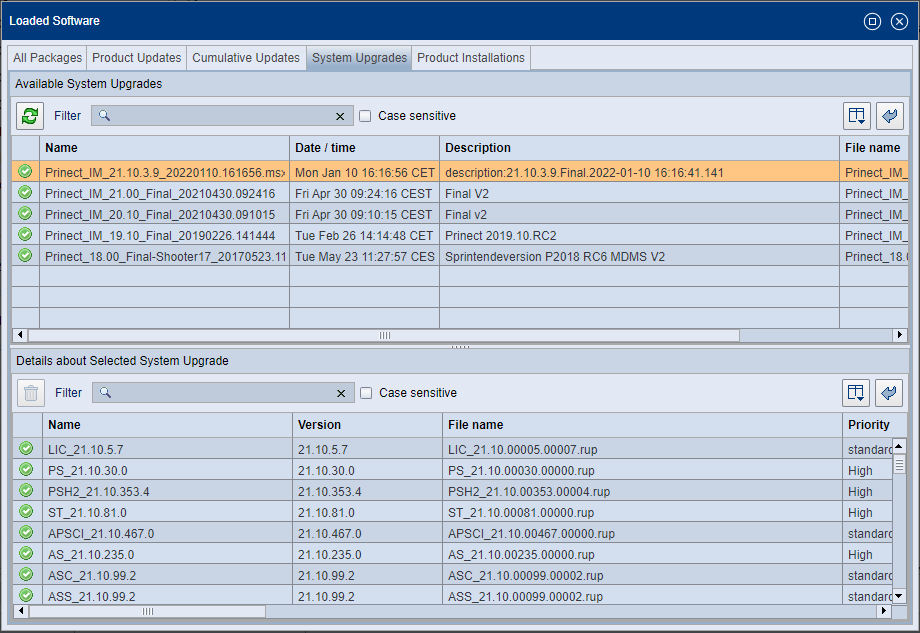
"Available System Upgrades" area
All system upgrades available in the PMC or local repository are displayed here. During installation, system upgrades are updated to the version defined in the "Description" column. This description — and not individual products — determines the upgrade version.
"Details about Selected System Upgrade" area
Displays information about the components (Remote Update Packages — RUP) of the system upgrade selected in the upper list.
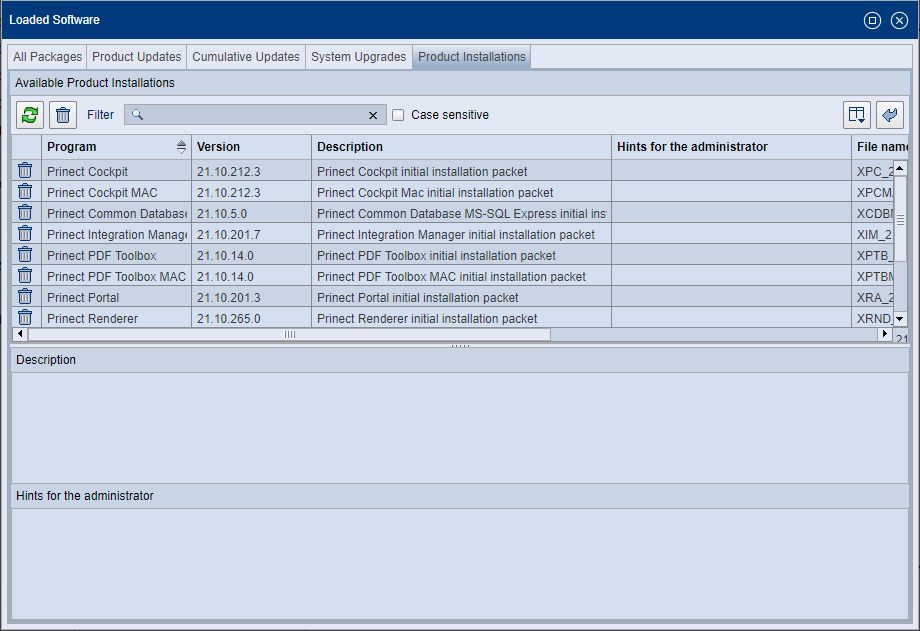
The installation packages of the individual Prinect products are displayed here. The names of the Prinect products are listed in the "Program" column.
In the lower part of the window you can find the "Description" and "Hints for the Administrator" fields. When you select a product installation, the corresponding information will appear in these fields. This can be useful if the information is too long to be displayed in the corresponding columns.
The "Data Transfers" window
Displays current and previous transfers of software packages. This allows you to track when which software packets are or were transferred between the PSC and the local PMC.
"Uploads / Downloads"
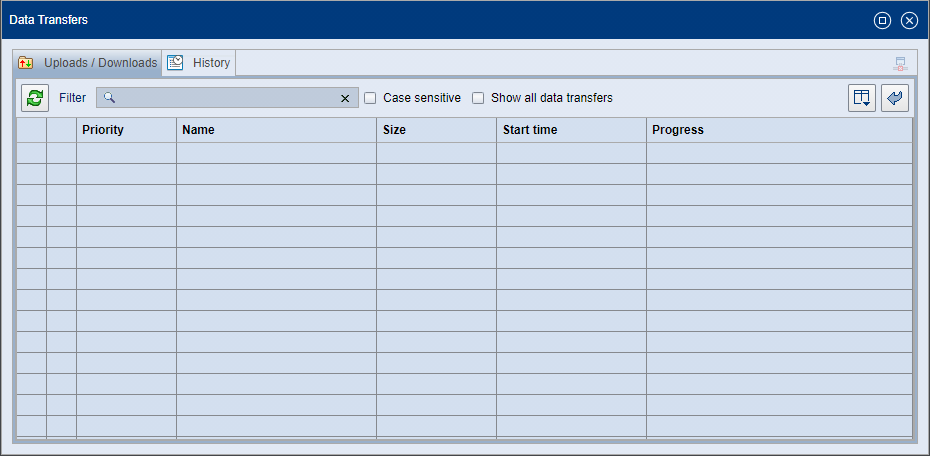
Only the data transfers currently in progress are displayed here. When a transfer (upload / download) is finished, this item is no longer displayed. The appropriate software package is then displayed in the "Loaded Software" window.
If you want to urgently download a specific software package displayed here, you can select the relevant entry and use the corresponding context menu command to raise the download priority.
The items in this list can have the following states:
| The package is currently being downloaded. |
| The installation of the package is already planned and will be started soon. |
| The data transfer is paused due to a temporary error, e.g. if the HEIDELBERG PSC cannot be reached. |
| If a pause lasts for too long due to a temporary error, it will be categorized as a permanent error and the transfer will be removed from this window immediately. This icon will then appear briefly. |
| The package is available and can be installed. |
The following icon can be displayed in the upper right corner of the dialog:
| Connection error: All data transfers are canceled, and all items in the "Uploads/Downloads" tab are being removed. |
 Note: The download status is also displayed as a progress bar in the message area of the PMC main window.
"History" tab
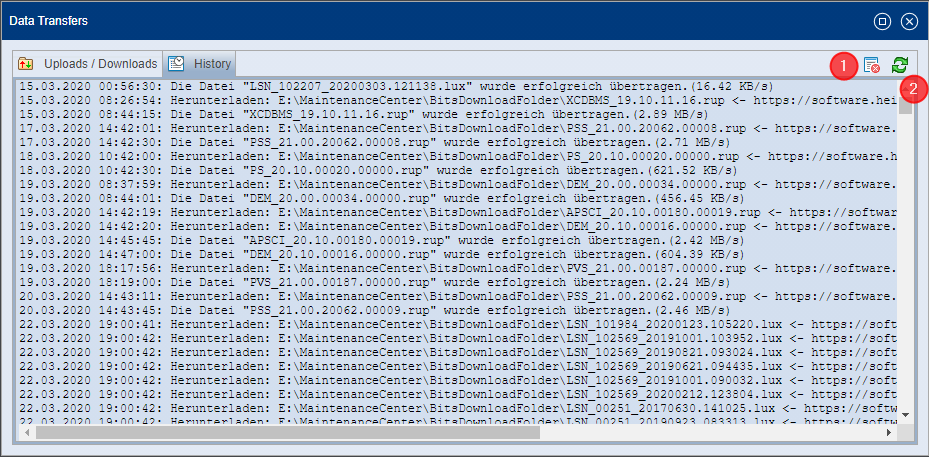
Here you can view the data transfer history to the present.
Delete history (1)
Use the "Delete" button to delete the contents of the history log.
Refresh view (2)
Use the "Refresh" button to refresh the log content.
The "Licensing State" window
Here you can get an overview of the licensing state of the installed Prinect components. This window is useful if there are problems caused by the licensing state, such as when the Supervisor cannot start components.
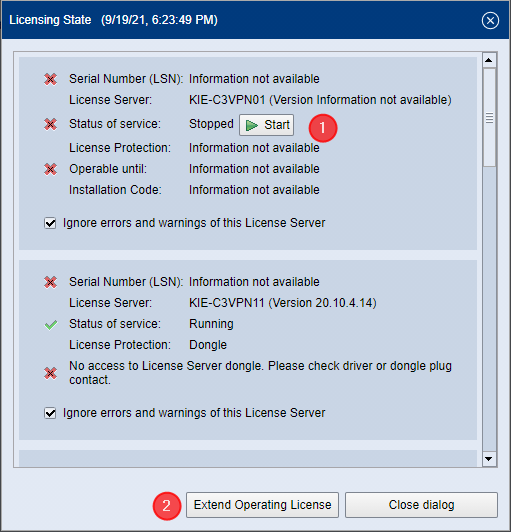
This screen displays information about the status of the Prinect License Servers connected to the PMC. A separate area is displayed for each Prinect License Server. The example shows the areas for two Prinect License Servers.
The Prinect License Servers can have the following states:
| Online licensing: •The operating license for this server is valid. It will remain valid for exactly 30 days even if the HEIDELBERG Connection fails. Dongle licensing: •The dongle is plugged in and verified. |
| Online licensing: •The Operating License is valid for less than 20 days and more than 15 days or •There are node lock licenses not associated with a computer. |
| Online licensing: •The operating license for this server is only valid for less than 16 days or it is invalid, or •At least one Prinect License Server uses the same serial number (LSN). Dongle licensing: •The dongle is not plugged in or not verified. |
The following status changes are detected on the Prinect License Servers:
•Installing / uninstalling Prinect License Server software,
•The Prinect License Server is active / not active,
•The hardware dongle was plugged in/removed,
•The expiration date of an online licensing has changed,
•The computer running the Prinect License Server software has been shut down or booted.
Button "Start" (1)
In the upper part of the example, the Prinect License Server service is stopped, which means that the Prinect License Server is unavailable and cannot license products. You can start the service again with the "Start" button. If the service cannot be started, the cause for this must be clarified on the Prinect License Server computer in question, and how this can be corrected.
In the example, the Prinect License Server service is started in the lower area, but access to the required dongle is not possible. Again, you must solve the problem at the Prinect License Server computer.
"Ignore errors and warnings of this License Server" option
If you enable this option, error messages related to licensing and caused by the relevant Prinect License Server are not displayed in the message pane of the PMC main window.
Button "Extend Operating License" (2)
If the operating license for Prinect License Server with online licensing has expired, you can use this button to initiate a request for an extension of the operating license. The request is sent to the HEIDELBERG Trust Service, and the operating license is extended after successful verification.
 Caution: Starting with MacOS 15 Sequoia, connection problems with the license server may occur. This may be because a "private" Wi-Fi address is pre-configured in this operating system version. Remedy: On your Mac, under "Settings > Network > Wi-Fi / Ethernet > "Your Network", disable the "Private Wi-Fi Address" option.
The "Send Message" window
Here you can send a message to the computers selected in the lower area. In this way, for example, you can announce a pending update or upgrade and ask the respective operators to stop all activities and close the affected applications.
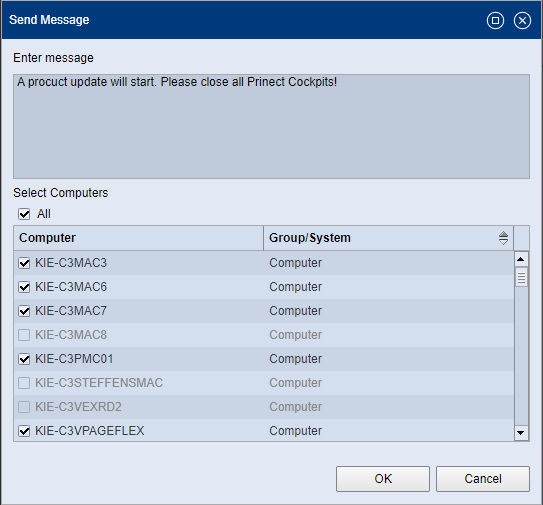
Type the message text in the "Enter message" area and in the list select the computers that are to receive the message. Click "OK" to send the message to the computers you have selected.
The following window opens on the selected computers:
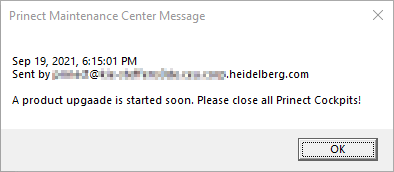
This window will pop up on top of all other open windows on the target computer. Click "OK" to close the message box again.
The "All" option in the lower area is enabled by default. The message is then sent to all computers currently connected to the PMC. The corresponding computers are selected in the list. Computers that are not connected cannot be selected (see screenshot). Disabling the "All" option will deselect all selected computers. You can then select individual target computers to be notified.
The "Certificate Management" window
Why the Certificate Management?
Security certificates are required, which must be issued specifically for each HTTPS server to access web pages that use the HTTPS Internet protocol — such as Prinect Maintenance Center or Prinect Software Center. On the Internet, certificates are organized in a hierarchy whose root certificate has been issued by an official certification authority, the Certification Authority — CA. These root certificates are stored in the operating system's certificate store and are updated during operating system updates.
When opening a web page of an HTTPS server, its certificate is verified with the root certificate, allowing the browser to verify the page's authenticity.
Official certificates are issued only for HTTPS servers that can be reached on the Internet; this does not apply, for example, to Prinect computers within a system environment connected to the PMC. In order to enable HTTPS certification for these computers, the Prinect Maintenance Center itself assumes the role of a certification authority for the Prinect computers within the local system environment. For this purpose, the PMC generates a specific root certificate, the "HEIDELBERG Customer CA Certificate", and all the certificates derived from it.
The HEIDELBERG Customer CA certificate must be installed on each Prinect computer to allow Prinect services to be used — for example for software updates. The HEIDELBERG Customer CA certificate is automatically installed on computers managed by Prinect Maintenance Center.
This certificate must be downloaded and installed manually on computers not managed by Prinect Maintenance Center but that also use the Prinect services.
Download and install certificate
Clicking the "Download HTTPS certificate" button opens the "Certificate management" dialog:

Clicking "Download certificate" will download the required HTTPS certificate to the local download folder.

The file name is "HEIDELBERG Customer CA", followed by the name of the PMC computer acting as certification authority in this case. The file extension is ".cer".
Following the download, you must install the certificate on the computer or import it into the certificate store.
•Installation on a Windows PC
•HTTPS certificate installation on Mac computers
 Prerequisite: You must be logged in with Administrator rights on the Windows PC.
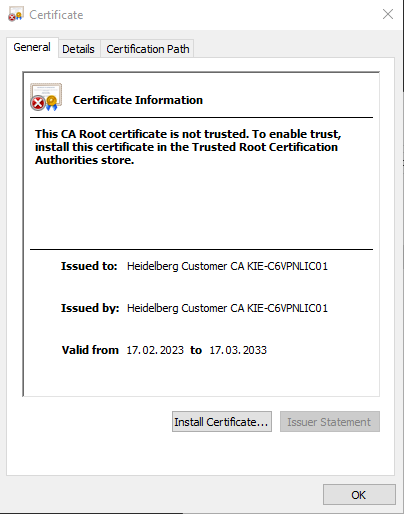
1.Double click the certificate file to start installation. Usually, the file opens in "Crypto Shell Extension". If another program — such as "XCA" — starts, open the file with "Crypto Shell Extension" using the context menu. The following dialog opens:

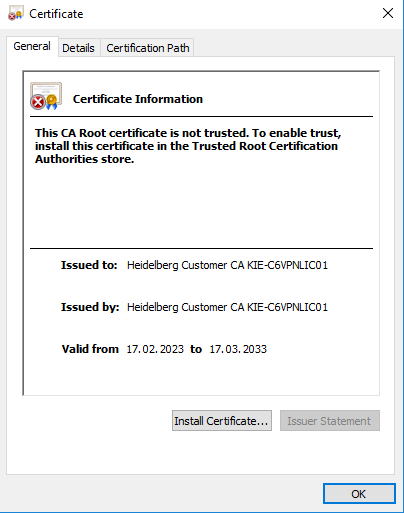
2.Click "Install certificate". The "Certificate Import Wizard" opens:
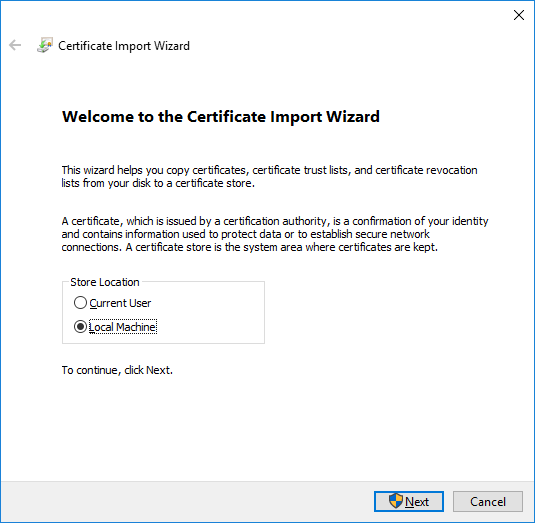
3.Select "Local Machine". This will install the certificate so that it is valid for the entire computer.
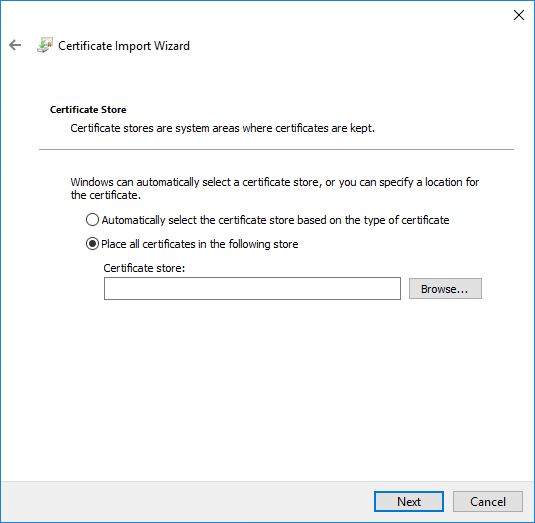
4.Enable the option "Place all certificates in the following store" and click "Browse" to select the folder where the certificate is to be stored.

5.Select the folder "Trusted Root Certification Authorities". Confirm with "OK".
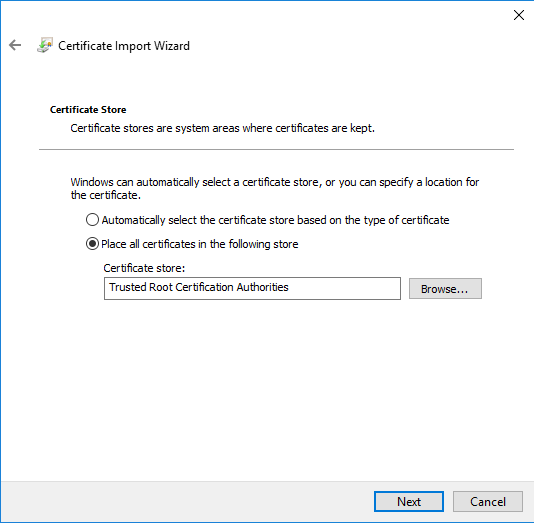
6.Click "Next".

7.Click "Finish"; the following dialog opens:
8.Click "OK". Upon completion, a confirmation dialog is displayed:
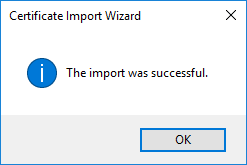
Click "OK". The HEIDELBERG Customer CA certificate has now been installed successfully. If the Internet browser is open during installation, it must be closed and reopened once for the certificate to be recognized.
Privacy Policy | Imprint | Prinect Know How | Prinect Release Notes