
This shows the surface properties. You can choose between the "Properties", "Page Assignment", "Colors" and "History" tabs.
You can enter a comment in the "Comment" box in the "Properties" tab.
The other data are for your information only.
You will find a description of most of the data in Columns in the list view of the "Imposition view".
You can view information about page assignment in the "Page Assignment" tab. This information refers to:
•Positions
•Assigned Pages
•Inks
•Page List
In the "Colors" tab, you can view the product colors for the surfaces, map colors to another color and change the printing order of the colors. You will find more information in the section "Properties" Section.
Color List
You can select between the following view modes in the list box:
•All Colors
All available product colors are shown in "Surface Colors" if you select "All Colors".
•Existing Colors
Only the product colors in the surfaces are shown in "Surface Colors" if you select "Existing Colors".
You can also view history details about the selected surface in the "History" tab.
Button bar at bottom
|
Button |
Function |
|---|---|
|
Save |
You can select this button only if inputs or changes can be made in the "Properties". In this case, the change is applied and saved when you click this button. |
|
Close |
Click this button to close the surface properties and display the dynamic window again in its full size. If you made changes that were not saved, you are prompted to save or discard them before closing the window. |
In the "show layout assignment view", both "page view" and "layout view" are shown side by side. This view lets you assign pages in a fast and easy-to-follow way to the layout using drag-and-drop.
Show Thumbnails
You will find functions for "grouping" at the top of the window if "Show Thumbnails" is enabled. This gives you the option of grouping the pages by their functions. Multiple selection is possible.
Buttons in the "show page list assignment" view
The button bar is the same as that in the "layout view" (see Buttons in the 'Imposition' view ).
Context-sensitive menu for "layout assignment view"
Right-click in the "Layout assignment view" screen to open a context-sensitive menu.
Note: Some of the functions in the context-sensitive menu are identical to the buttons displayed in the "Layouts" view mode screen.
|
Context-sensitive menu |
Function |
|---|---|
|
Delete |
Select "Delete" (shortcut Ctrl + Del) to delete the selected pages following confirmation of this action. |
|
Paste to "Gang Job" |
You can paste pages that you copied from another job to the clipboard into the active job (gang run job) when you select this function (shortcut Ctrl + Shift + V). |
|
Paste |
The pages you copied beforehand are pasted to the open job when you select "Paste" (shortcut Ctrl + V). |
|
Copy |
The information you need in the selected pages is copied to the clipboard when you select "Copy" (shortcut Ctrl + C). |
|
Show Thumbnails |
The "Show Thumbnails" function (F4 key) changes the view from a list view to a thumbnails view (a checkmark is now set in front of the function). The checkmark disappears when you select the function again, and the list view appears again. |
|
Collapse All |
All lower levels that are open are hidden when you select "Collapse All" (shortcut Alt + left arrow). |
|
Expand All |
All lower levels that are closed are shown when you select "Expand All" (shortcut Alt + right arrow). |
|
View Properties |
Select this function to display the "View Properties" window (see also "View Properties Layouts (Thumbnails)" Window). In this window, you can define settings for displaying the thumbnails. |
"Select Printing Material" Window
You can select printing material in this window.
Column groups/quick search
The Quick Search and column groups let you display the printing materials in such a way that you can find the ones you want again fast (see also Structured view).
Type in the text you are looking for in the Quick Search box. The system now scans the "Job Number", "Job Name" and "Job Group" columns for the text you are looking for. All items that do not contain this search item are hidden.
Width/Height Unit
You can change the unit of measure in the list box.
Items
This shows the number of available printing materials.
Column set
This is where you select the columns you want for displaying data in the middle pane. You can also create a new one (see also Define a custom column set ).
The middle panel displays the available printing materials that you can select. This is where you can enable the printing material you want and confirm it by clicking "Select".
In this window, you can change the paper size.
Media width
This displays the width of the printing material. You can change this value if required.
You can set the unit of measure in the list box next to it. The value in the box is matched automatically to the unit of measure.
Media height
This displays the height of the printing material. You can change this value if required.
You can set the unit of measure in the list box next to it. The value in the box is matched automatically to the unit of measure.
In this window, you can change the paper size.
Media width
This is where you set the media width. Select the unit of measure in the list box.
Media height
This is where you set the media height. Select the unit of measure in the list box.
Button bar at bottom
|
Button |
Function |
|---|---|
|
OK |
Click this button to apply the settings you selected and close the window. |
|
Cancel |
Click this button to close the window without saving any changes. Any settings or inputs you made will be lost. |
In this window, you will find functions for duplicating an existing layout.
Layout Name
This displays the name of the selected layout.

Note: You can modify the layout name here. If the name you want exists already, it displays in red and the "OK" button is disabled.
Force unique Sheet Names in the Job
You can rename sheets if necessary (see below in "Sheet Naming"). This option lets you toggle the function on and off. All the sheets are always renamed with this function.
It is a good idea to rename the sheets especially if the layout you wish to duplicate has at least one sheet name that is already in the job. In this case, the option is always enabled.
"Sheet Naming"
Rename Mode
This is where you select the rule that you will use to generate the new sheet names.

Note: Use a rule where the old sheet name and a new number will be used (see below). If the old sheet name already has a number, the new number will overwrite this one. This means that a new number is not added to an existing number.

Note: The "OK" button is dimmed if you generate sheet names that are already in the job. In addition, the inputs in "Start Number" and "Additional Name" are red.
Below you will find an example for the following data for each mode:
•Old sheet names: sheet1, sheet2 sheet3 etc.
•Additional Name: New-
•Start Number: 003
Description of the rename mode:
•"Additional Name" + "Old Name": The text entered in "Additional Name" together with the old sheet name now make up the new sheet name.
Example for new sheet names: New-sheet1, New-sheet2, New-sheet3 etc.
•"Old Name" + "Number": The old sheet name and the new number (see "Start Number") now make up the new sheet name.
Example for new sheet names: sheet003, sheet004, sheet005, etc.
Remember in this case that the new number replaces the number in the old sheet name. In other words, the new number is not simply added on.
•"Additional Name" + "Number": The text entered in "Additional Name" together with the new number (see "Start Number") now make up the new sheet name.
Example for new sheet names: New-003, New-004, New-005 etc.
•"Number" + "Old Name" + "Number": The old sheet name and the new number (see "Start Number") now make up the new sheet name.
Example for new sheet names: 003sheet003, 004sheet004, 005sheet005 etc.
Remember in this case that the new number replaces the number in the old sheet name. In other words, the new number is not simply added on.
"Number" + "Additional Name" + "Number": The text entered in "Additional Name" together with the new number (see "Start Number") now make up the new sheet name.
Example for new sheet names: 003New-003, 004New-004, 005New-005 etc.
Start Number
Enter the start number in this box if the new sheet names are to have new numbers. You can also enter leading zeros (e.g. 003).
The new numbers are generated in ascending order as of this number. The generated numbers have as many digits as the start number you entered. This means that leading zeros may be prefixed (e.g. 004, 005, 006).
Additional Name
This is where you can enter text that can be used for generation of the new sheet names.
Create New Page List
A page list that matches this layout perfectly is created during the import if this function is checked.
A page list is not created during the import if the function is not checked.
Page List Name
This displays the name of the new page list.

Note: You can modify the page list name here.
Button bar at bottom
|
Button |
Function |
|---|---|
|
OK |
Click this button to apply the settings you selected and close the window. |
|
Cancel |
Click this button to close the window without saving any changes. Any settings or inputs you made will be lost. |
"View Properties Layouts (Thumbnails)" Window
In this window, you can define settings for displaying the thumbnails.
Thumbnail Scaling
Use the slider to set the size of the thumbnails (in %).
Show Status Icons
Status icons also display to the right of each thumbnail if this function is enabled.
Show Page Positions
The relevant page positions are displayed in the thumbnails if this function is enabled.
Color (Show Page Positions)
This is where you can select the hue for the display if "Show Page Positions" is enabled.
Show Article Numbers
The relevant article numbers display if this function is enabled.
Color (Show Article Numbers)
This is where you can select the hue for the display if "Show Article Numbers" is enabled.
Show grid
A grid displays between the thumbnails if this function is enabled.
Color
This is where you can select the hue for the grid if "Show grid" is enabled.
Show Source Job Number
When this function is enabled, the number of the job (source) from which the page was copied displays.
Color
This is where you can select the hue for the display if "Show Source Job Number" is enabled.
Check box for version details
This is where you can view additional details about the version.
•Show Version Names
You can view the version names when this function is enabled.
•Show Version Description
You can view the version description when this function is enabled.
•Show Version Name and Description
The version name and version description display when this function is enabled.
•Do Not Show Versions Details
No version details display when this function is selected.
Color (version details)
This is where you can select the hue for displaying the details if one of the "version details" functions is enabled.
Button bar at bottom
|
Button |
Function |
|---|---|
|
OK |
Click this button to apply the settings you selected and close the window. |
|
Apply |
Click this button to apply the settings you selected. |
|
Cancel |
Click this button to close the window without saving any changes. Any settings or inputs you made will be lost. |
You can submit jobs to ganging in this window. This function is needed to gather parts of a job that have different print requirements to the rest of the job (e.g. covers with a different paper width) together with parts of other jobs that have the same requirements and to print them jointly on one plate (see also Gang jobs).
The data are filed as an xml file in the gang job pool of Prinect Signa Station.
Because pages or sheets of a job must be selected for submit to ganging, the procedure is as follows:
"All sheets" are submitted if there are sheets with assigned pages in the job. Nothing is submitted if no page is assigned.
The "pages of page lists" are submitted if there are page lists with assigned pages instead of sheets.
"All pages" of the job are submitted if there are no page lists with assigned pages. Nothing is submitted if the job has no pages.
Delivery quantity
Enter the delivery quantity in this box.
Overproduction
This is where you enter overproduction in percent.
Product Code
Enter an existing product code in this box.
Version

Note: The list box for "Version" can be used only if versioned sheets are to be submitted.
This is where you select the version to be submitted. You can select single versions to be submitted or "All" if you wish to submit all existing versions.

Note: Depending on the version you selected, the contents of the boxes for delivery quantity and overproduction may change.
Folding
This is where you can overwrite the folding rule of the selected product part template.
You can also set the proportions for an asymmetric fold. This is done in the "Rule" text box.
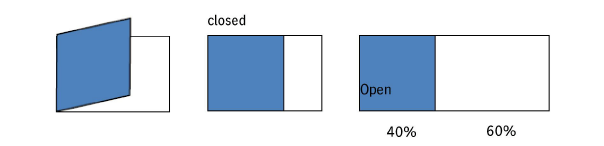
Example: Scheme: "F4-1" and rule: "X40X60" (for a business card with an asymmetric fold)
Scheme
You can type the name of the folding scheme directly into this box (e.g. "F4-1").
"Select" button
Click the "Select" button to open a window where the existing schemes of Prinect Signa Station are listed. Select the scheme you need. It displays in the "Scheme" text box only after you confirm with "OK" and close the window.
Rule
You can use this text box whenever the "Scheme" text box has an item. You will find more details about folding rules in the tooltip.
Any available sequence templates display when you click "+". Select a Prepare sequence from the list.
This displays the press sheets enabled by the "Change" button.
"Change" button
Click "Change" to open the "Colors" window. You can select the press sheets you want for ganging in this window.
Printing material quality
This is where you enter the printing material quality using the same term as at Prinect Signa Station (e.g matt, glossy, etc.).
Paper Grammage
This is where you enter the paper grammage in g/m².
Grain Direction
This is where you select the orientation to the paper grain (normal, rotated, uniform).
Set Due Date
The date box you need is enabled for editing when you select the "Set Due Date" function. You can enter a date (day and time) in this box by which the job is to be finished.
"Select Due Date" button
Click this button to display a date window, see also the "Choose Date" Window.
Comment
You can type in any comment in this box, for example, explaining the reason for charging costs.
Status
During "Submit to Ganging", you can add user-defined attributes to the job, edit or delete existing ones. This shows whether attributes are used or not.
"Edit" button
Click the "Edit" button to display the "User-defined Attributes" window. Select the attributes you need for your job. If there are no user-defined attributes in the system, a message displays, informing you where you can create the attributes.

Note: You can create user-defined attributes in "Administration > Preferences > All Users > User-defined Attributes".
Button bar at bottom
|
Button |
Function |
|---|---|
|
OK |
Click this button to apply the changes you made. |
|
Cancel |
Click this button to close the window without doing anything. |
You can create a layout with predefined product part templates in the "Provide Layout" window. You can specify the name of the layout or replace an existing one. In addition, you can select a Signa Station product part template that you can use to create the layout. You can enter the name and number of page positions of a new page list or select an existing page list.

Note: The product part templates from Prinect Signa Station display only if the relevant settings were made at Prinect Signa Station.
•The MDS server must be entered and enabled on Prinect Signa Station.
(Signa Station > Preferences > Import)
•Global preferences must be enabled.
(Signa Station > Preferences > General)
•The workspace must be on a network drive that can be accessed.
(Signa Station > Preferences > Paths)
Layout Name
Enter the name of the new layout in this box. A layout is replaced if the layout name already exists.
Filter
|
|
Use the filter function to filter the available product part templates by the numbers, letters or keywords that you enter. |
Product Part Templates
This displays the existing product part templates. Select the product part template that you want the new layout to be part of.
Create New Page List
This can be done in two ways:
•You wish to create a new page list for the new layout. Set this option. You can then also enter a page list name.
•You do not wish to create a new page list but link the new layout to existing page lists. In this case, do not set this option.
With this setting, "Assign Page List(s)" shows you (by default) all the page lists that are not yet linked to a layout (see "Assign Page List(s)" ).
Page List Name
You can enter a name in "Page List Name" if "Create New Page List" is enabled. In this case, a page list with this name is generated automatically and assigned to the layout after the layout is created at the Prinect Signa Station (the previous page list of the layout is kept).
You can use existing page lists if the function is disabled.
Assign Page List(s)
You can decide not to create a new page list for the new layout but to assign existing page lists to the layout.
The existing page lists are listed as follows for you to set as you need:
•"Show assigned page lists of other layouts and levels" is not set:
In this case, the list shows you all the pages lists that are not yet linked to a layout.
•"Show assigned page lists of other layouts and levels" is set:
In this case, the list shows you all the pages lists, irrespective of whether they are linked to a layout or not.
Use "Add" and "Remove" to group a list of page lists on the right, all of which will be assigned to your new layout.
Remember the following items when doing so:
•The page list positions must match your layout positions, especially if you select several page lists. You cannot assign two page list positions to one layout position.
•New versioning: If you work with the new versioning, you can assign a matching set of page lists to the layout per version. This means that for each version you can assign a page list position to a layout position.
Show assigned page lists of other layouts and levels
When this option is set, "Assign Page List(s)" shows you all the pages lists, irrespective of whether they are linked to a layout or not.
Button bar at bottom
|
Button |
Function |
|---|---|
|
OK |
Prinect Signa Station launches when you click "OK". |
|
Cancel |
Click this button to close the window without doing anything. |
You can create a new layout interactively with Prinect Signa Station in the "New Layout" window.
Product Parts
This shows the base and the product parts. Select the product part that you want the new layout to be part of.
Layout Name
Enter the name of the new layout in this box.
You cannot use this text box (it has a default) if you selected an existing layout or a MIS parameter set.
Proof Layout
The new layout is created as a proof layout if you select this option.
A proof layout doesn't display in the sheet view mode screen and separation view mode screen. Other than this, a proof layout is like a "normal" layout.
Create Layout as Copy
This option lets you create a copy of the layout.
Create New Page List
This can be done in two ways:
•You wish to create a new page list for the new layout. Set this option. You can then also enter a page list name.
•You do not wish to create a new page list but link the new layout to existing page lists. In this case, do not set this option.
With this setting, "Assign Page List(s)" shows you (by default) all the page lists that are not yet linked to a layout (see "Assign Page List(s)" ).
Page List Name
You can enter a name in "Page List Name" if "Create New Page List" is enabled. In this case, a page list with this name is generated automatically and assigned to the layout after the layout is created at the Prinect Signa Station (the previous page list of the layout is kept).
You can use existing page lists if the function is disabled.
Assign Page List(s)
You can decide not to create a new page list for the new layout but to assign existing page lists to the layout.
The existing page lists are listed as follows for you to set as you need:
•"Show assigned page lists of other layouts and levels" is not set:
In this case, the list shows you all the pages lists that are not yet linked to a layout.
•"Show assigned page lists of other layouts and levels" is set:
In this case, the list shows you all the pages lists, irrespective of whether they are linked to a layout or not.
Use "Add" and "Remove" to group a list of page lists on the right, all of which will be assigned to your new layout.
Remember the following items when doing so:
•The page list positions must match your layout positions, especially if you select several page lists. You cannot assign two page list positions to one layout position.
•New versioning: If you work with the new versioning, you can assign a matching set of page lists to the layout per version. This means that for each version you can assign a page list position to a layout position.
Show assigned page lists of other layouts and levels
When this option is set, "Assign Page List(s)" shows you all the pages lists, irrespective of whether they are linked to a layout or not.
Assign Sequence(s)
In "Assign Sequence(s)", you can assign one or more sequences to the new layout.
"Assign" button
Click "Assign" to select a sequence that you wish to assign to the new layout.
•You already added templates to your job: Select the template you want in the "Assign Sequence(s) to Layout" window.
•You have not yet added templates to your job: Click the "Add Template" button in the "Assign Sequence(s) to Layout" window. Browse to the template that you wish to add. Only then can you assign this template.
Button bar at bottom
|
Button |
Function |
|---|---|
|
OK |
Prinect Signa Station launches when you click "OK". |
|
Cancel |
Click this button to close the window without doing anything. |
You can import a layout in this window and assign it to a job or its product parts.
Product Parts
This is where you select the base or the product part to which you will import the layout.
File name
The path where the selected layout is located is shown here.
Click this button to open the "Select Layout" window (see also "Select Layout" Window) where you can then select the layout you wish to import.
Layout Name
This displays the name of the selected layout.

Note: You can modify the layout name here.
Proof Layout
The layout can be used for proofing only if you selected the "Proof Layout" option. It can only be linked to a proof sequence but not to an output sequence.
Force unique Sheet Names in the Job
You can enable and disable the renaming of sheets with this option (see Rename Mode). All the sheets are always renamed with this function.
It is a good idea to rename the sheets especially if the layout you wish to import has at least one sheet name that is already in the job. In this case, the option is always enabled.
A warning then displays when you are still in the "Select Layout" window (see "Select Layout" Window).
"Sheet Naming"
This is where you select the rule that you will use to generate the new sheet names.

Note: Use a rule where the old sheet name and a new number will be used (see below). If the old sheet name already has a number, the new number will overwrite this one. This means that a new number is not added to an existing number.

Note: The "Import" button is dimmed if you generate sheet names that are already in the job. In addition, the inputs in "Start Number" and "Additional Name" are red.
Below you will find an example for the following data for each mode:
Old sheet names: sheet1, sheet2 sheet3 etc.
Additional Name: New-
Start Number: 003
Description of the rename mode:
•"Additional Name" + "Old Name": The text entered in "Additional Name" together with the old sheet name now make up the new sheet name.
Example for new sheet names: New-sheet1, New-sheet2, New-sheet3 etc.
•"Old Name" + "Number": The old sheet name and the new number (see "Start Number") now make up the new sheet name.
Example for new sheet names: sheet003, sheet004, sheet005, etc.
Remember in this case that the new number replaces the number in the old sheet name. In other words, the new number is not simply added on.
•"Additional Name" + "Number": The text entered in "Additional Name" together with the new number (see "Start Number") now make up the new sheet name.
Example for new sheet names: New-003, New-004, New-005 etc.
•"Number" + "Old Name" + "Number": The old sheet name and the new number (see "Start Number") now make up the new sheet name.
Example for new sheet names: 003sheet003, 004sheet004, 005sheet005 etc.
Remember in this case that the new number replaces the number in the old sheet name. In other words, the new number is not simply added on.
•"Number" + "Additional Name" + "Number": The text entered in "Additional Name" together with the new number (see "Start Number") now make up the new sheet name.
Example for new sheet names: 003New-003, 004New-004, 005New-005 etc.
Start Number
Enter the start number in this box if the new sheet names are to have new numbers. You can also enter leading zeros (e.g. 003).
The new numbers are generated in ascending order as of this number. The generated numbers have as many digits as the start number you entered. This means that leading zeros may be prefixed (e.g. 004, 005, 006).
Additional Name
This is where you can enter text that can be used for generation of the new sheet names.
Create New Page List
This can be done in two ways:
•You wish to create a new page list for the imported layout. Set this option. You can then also enter a page list name.
•You do not wish to create a new page list but link the imported layout to existing page lists. In this case, do not set this option.
With this setting, "Assign Page List(s)" shows you (by default) all the page lists that are not yet linked to a layout (see "Assign Page List(s)" ).
Page List Name
You can enter a name in "Page List Name" if "Create New Page List" is enabled. In this case, a page list with this name is generated automatically and assigned to the layout after the layout is imported.
You can use existing page lists if the function is disabled.
"Assign Page List(s)" Group
You can decide not to create a new page list for the imported layout but to assign existing page lists to the layout.
The existing page lists are listed as follows for you to set as you need:
•"Show assigned page lists of other layouts and levels" is not set:
In this case, the list shows you all the pages lists that are not yet linked to a layout.
•"Show assigned page lists of other layouts and levels" is set:
In this case, the list shows you all the pages lists, irrespective of whether they are linked to a layout or not.
Use "Add" and "Remove" to group a list of page lists on the right, all of which will be assigned to the imported layout.
Remember the following items when doing so:
•The page list positions must match your layout positions, especially if you select several page lists. You cannot assign two page list positions to one layout position.
•New versioning: If you work with the new versioning, you can assign a matching set of page lists to the layout per version. This means that for each version you can assign a page list position to a layout position.
Show assigned page lists of other layouts and levels
When this option is set, "Assign Page List(s)" shows you all the pages lists, irrespective of whether they are linked to a layout or not.
Assign Sequence(s)/Sequence Name(s)
This shows the name of the assigned sequence(s).
"Assign" button
Click the "Assign" button to open the "Assign Sequence(s) to Layout" window (see also the "Assign Sequence(s) to Layout" Window).
Button bar at bottom
|
Button |
Function |
|---|---|
|
Import |
Prinect Signa Station launches when you click "OK". Note: Import is not possible if a job already has a layout of the same name. |
|
Cancel |
Click this button to close the window without saving any changes. Any settings or inputs you made will be lost. |
You can replace a selected layout in this window.
File name
This displays the file name and path of the selected layout.
"Browse" button
Click this button to display the "Select Layout" window (see also the "Select Layout" Window). You can select the new layout here.
Proof Layout
The layout can be used just for proofing if you selected the "Proof Layout" option. It can be linked only to a proof sequence but not to an output sequence.
Take Sheet Name from New Layout
The sheet name of the old layout is replaced by the sheet name of the new layout if "Take Sheet Name from New Layout" is enabled.
Create New Page List
This can be done in two ways:
•You wish to create a new page list for the replacing layout. Set this option. You can then also enter a page list name.
•You do not wish to create a new page list but link the replacing layout to existing page lists. In this case, do not set this option.
With this setting, "Assign Page List(s)" shows you (by default) all the page lists that are not yet linked to a layout (see "Assign Page List(s)" ).
Page List Name
You can enter a name in "Page List Name" if "Create New Page List" is enabled. In this case, a page list with this name is generated automatically and assigned to the layout after the layout is replaced.
You can use existing page lists if the function is disabled.
"Assign Page List(s)" Group
You can decide not to create a new page list for the layout but to assign existing page lists to the layout.
The existing page lists are listed as follows for you to set as you need:
•"Show assigned page lists of other layouts and levels" is not set:
In this case, the list shows you all the pages lists that are not yet linked to a layout.
•"Show assigned page lists of other layouts and levels" is set:
In this case, the list shows you all the pages lists, irrespective of whether they are linked to a layout or not.
Use "Add" and "Remove" to group a list of page lists on the right, all of which will be assigned to the replacing layout.
Remember the following items when doing so:
•The page list positions must match your layout positions, especially if you select several page lists. You cannot assign two page list positions to one layout position.
•New versioning: If you work with the new versioning, you can assign a matching set of page lists to the layout per version. This means that for each version you can assign a page list position to a layout position.
Show assigned page lists of other layouts and levels
When this option is set, "Assign Page List(s)" shows you all the pages lists, irrespective of whether they are linked to a layout or not.
Assign Sequence(s)/Sequence Name(s)
This shows the name of the assigned sequence(s).
"Assign" button
Click the "Assign" button to open the "Assign Sequence(s) to Layout" window (see also the "Assign Sequence(s) to Layout" Window).
Button bar at bottom
|
Button |
Function |
|---|---|
|
Replace |
Click "Replace" to replace the selected layout. |
|
Cancel |
Click this button to close the window without saving any changes. Any settings or inputs you made will be lost. |
Select the layout you want and click "OK" for confirmation.

Note: The window is dynamic; this means that the user interface varies according to the environment selected (Local, Prinect Integration Manager Neighborhood or Entire Network).
"Assign Sequence(s) to Layout" Window
In this window, you can select the sequence(s) that you want to assign to the layout.
Button bar at bottom
|
Button |
Function |
|---|---|
|
OK |
Click this button to accept the selected sequences and close the window. |
|
Cancel |
Click this button to close the window without saving any changes. Any settings or inputs you made will be lost. |
|
Add Template |
Click the "Add Template" button to display the "Select templates to add" window (see also the "Select Templates to Add" Window). |
"Select Templates to Add" Window
In this window, you can select the templates that you want to display in the "Assign Sequence(s) to Layout" window.
Display Successor Sequences
The next steps in the processing sequence display for the selected template when you select this function.
Button bar at bottom
|
Button |
Function |
|---|---|
|
Add |
Click "Add " to add the selected templates. |
|
Cancel |
Click this button to close the window without saving any changes. Any settings or inputs you made will be lost. |
"Assign Page Lists to Layout" Window
In this window, you can assign one or more page lists to a layout using page lists already in the job or you can unassign what you have done.
The existing page lists are listed as follows for you to set as you need:
•"Show assigned page lists of other layouts and levels" is not set:
In this case, the left list shows you all the page lists that are not yet linked to a layout.
•"Show assigned page lists of other layouts and levels" is set:
In this case, the left list shows you all the page lists, irrespective of whether they are linked to a layout or not.
Use "Add" and "Remove" to group a list of page lists on the right, all of which will be assigned to the layout.
Remember the following items when doing so:
•The page list positions must match your layout positions, especially if you select several page lists. You cannot assign two page list positions to one layout position.
•New versioning: If you work with the new versioning, you can assign a matching set of page lists to the layout per version. This means that for each version you can assign a page list position to a layout position.
Show assigned page lists of other layouts and levels
When this option is set, "Assign Page List(s)" shows you all the pages lists, irrespective of whether they are linked to a layout or not.
Button bar at bottom
|
Button |
Function |
|---|---|
|
OK |
Click this button to accept the changes and close the window. |
|
Cancel |
Click this button to close the window without saving any changes. Any settings or inputs you made will be lost. |
You can use this function only if you are working with product parts/versioning. This function is only enabled if at least one product part is selected.
This shows you the product parts with the layouts that are in the job. You can select a layout. The selected layout is assigned to the product part selected beforehand when you click "OK".
You can also create a new page list for the selected layout.
Create New Page List
The "Page List Name" group is enabled for use if this option is selected. A new page list is created when you click "OK".
Page List Name
You can enter any name for the page list in this box.

Note: By default, the name of the selected layout is shown. You can overwrite it with a name of your choice, if you wish.
Button bar at bottom
|
Button |
Function |
|---|---|
|
OK |
Click "OK" to assign the selected layout and, if necessary, create a page list. |
|
Cancel |
Click this button to close the window without saving any changes. Any settings or inputs you made will be lost. |
"Approval of Selected Elements" Window
You can set a customer or production approval status for the selected elements in this window. You can also type a comment, if necessary.
Customer
Select this function if you wish to set a customer approval status.
Production
Select this function if you wish to set a production approval status.
"Status" section
Approved
Click "Approved" to set the "Approved" symbol in the "Customer Approval Status" or "Production Approval Status" column in the "Layouts" view mode.
Not Approved
Click "Not Approved" to set the "Not Approved" symbol in the "Customer Approval Status" or "Production Approval Status" column in the "Layouts" view mode.
Unchecked
Click "Unchecked" to set the "Unchecked" symbol in the "Customer Approval Status" or "Production Approval Status" column in the "Layouts" view mode.
Comment
You can enter a comment that will be shown in the "Customer Approval Comment" or "Production Approval Comment" column in the "Layouts" view mode screen.
Button bar at bottom
|
Button |
Function |
|---|---|
|
OK |
Click this button if you wish to set the selected approval status and to enter a comment if desired. |
|
Cancel |
Click this button to close the window without saving any changes. Any settings or inputs you made will be lost. |
This shows you the sequences assigned to the layout.
The "Scheduling" group allows you to set up a schedule for submitting the layout to the sequence you selected.
Do Not Start Before
Nothing is submitted before the period (date/time) you entered. When the period is reached, the layout is submitted automatically to the sequence and the sequence is processed.
Planned Start
This input affects sorting in the queue. Jobs whose planned start is earlier than others are processed first.
Otherwise, no action is triggered, i.e. no layout is submitted and no sequence is processed.
Latest Completion
This input affects sorting in the queue. Jobs whose latest completion is earlier than other jobs are processed first.
Otherwise, no action is triggered, i.e. no layout is submitted and no sequence is processed.
The following is valid for all periods:
•Periods in the future are black. Periods in the past are red.
•A period you entered displays in the layout view, in the column with the sequence to which the period refers.
If there are several periods, "Do Not Start Before" has priority over the other two items.
Button bar at bottom
|
Button |
Function |
|---|---|
|
OK |
Click this button if you wish to set the selected approval status and to enter a comment if desired. |
|
Cancel |
Click this button to close the window without saving any changes. Any settings or inputs you made will be lost. |
In the "Paper Availability" window, you can define settings about the availability of the paper that are then shown in the "Paper Availability" column.
Paper
This displays the names of the paper types used.
Sheet
This shows how many sheets are affected by paper availability.
Paper Availability
This lets you select the availability from the suggested ones.
Delivery date
The date box is enabled when you select "Delivery date". You can now set a delivery date.
Button bar at bottom
|
Button |
Function |
|---|---|
|
OK |
Click this button to apply the settings and close the window. |
|
Cancel |
Click this button to close the window without saving any changes. Any settings or inputs you made will be lost. |
