
Administration - JDF Import
This is where you configure the settings needed for the JDF connection of a Management Information System (MIS) or Web Shop to the Prinect Manager.
Note: In earlier versions of the Prinect Manager, JDF import was set up in "Administration > System". The JDF import settings are no longer available there.
"Currently Used JDF Level" List Box
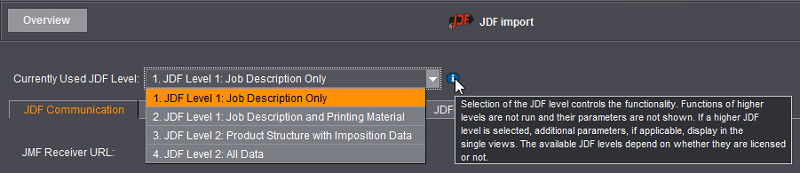
By selecting the JDF level, you define the amount of data to be transmitted from the MIS or Web Shop. By doing this, you can restrict the number of transmitted data types to avoid copying faulty data to the Prinect Manager. The number of options that display in the tabs of the JDF import varies according to the level you selected. In this example, all available options are described, in keeping with the top (4th) JDF level.
The various options are found in the following tabs:
You can select one or more "workflow profiles" by clicking the "+" sign in the "Folder Structure", "Master data" and "JDF Data Additions" tabs. The "Select desired workflow profiles" dialog opens. As a result, you decide for which systems connected via JDF import JDF data will be configured and used. You can remove the profile again by clicking the "-" sign beside a displayed profile. Connection to an MIS is enabled by default and cannot be deselected explicitly.
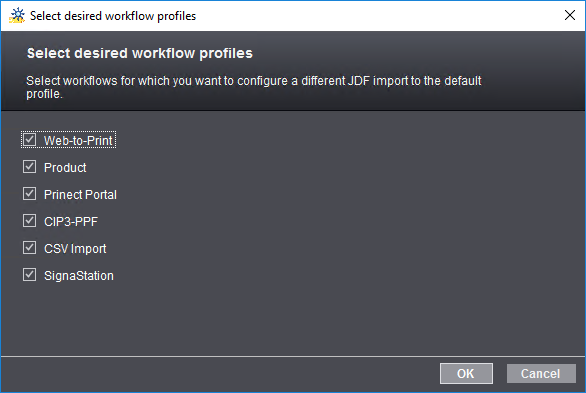
When a profile is selected, data exchange between the Prinect Manager and another workflow component suited to JDF using the mechanisms of the "Job Definition Formats (JDF)" is enabled and set up. You can set up the following connections:
•MIS (default)
The MIS workflow, i.e. the connection of the Prinect Manager to an MIS (Management Information System) via the JDF Import function, is enabled by default as soon as JDF Import has been enabled and configured.
•Web-to-Print:
When selecting this profile, you configure the JDF connection to a Web-to-Print application in your system environment.
•Product
When selecting this profile, you can enable and configure the JDF Import connection for products. See also Product Types.
•Prinect Portal
This profile represents the JDF connection with the Prinect Portal. You should always choose this profile if you are using the Prinect Portal.
•CIP3-PPF
With this profile you configure the connection of prepress systems compatible with CIP3-PPF. See also PPF Workflow — General.
•CSV Import
Certain data, e.g. addresses for circular letters, can exist as "Character Separated Values Tables" (CSV tables). This profile configures the JDF support for CSV data import.
•Signa Station
When selecting this profile, you can enable and configure the JDF Import connection of Signa Station. We recommend that you use this profile if a Prinect Signa Station is present in the system environment.

Note: The settings of the MIS profile will be used as the default for profiles that are not enabled. You do not have to enable a Web-to-Print profile if you do not need a special profile for Web-to-Print and if the settings for the MIS import can also be used for Web-to-Print.

In this tab, you can view and/or set up the following parameters:
•JMF Receiver URL: JMF reception of the Prinect Manager, e.g. by the MIS, can be addressed via this URL.
The default definition of this URL is: "http://[Prinect server name]:8889/jmfportal". In this case, the port number = 8889 and the path = jmfportal.
You cannot edit this data. If the JMF sender of your MIS has a different target URL, you must change it on your Management Information System.
•Hotfolder: This is the input directory for incoming JDF files. Only JDF files which are saved in this directory are processed automatically. The default folder is: "\\[Prinect servername]\PTConfig\Connector\JDFImport".
The JDF Import function can process input files of the "jdf", "xjdf", "xml", "zip", "mjd", and "mjm" types. Files written to the hotfolder will be processed with a delay of 2 seconds.
•JMF Compatibility: Enabling the option "Heidelberg advanced settings are available" will add Heidelberg-specific extensions to incoming messages in the JMF (Job Messaging Format) format. You should enable this option if the upstream system(s) (MIS, WEB Shop) is a Heidelberg product/are Heidelberg products. If not, disable this option to ensure the compatibility of the JMF format.
•Delete jobs: You can delete corresponding jobs in Prinect Manager if you enable the option "Allow deletion of jobs with JMF messages". You cannot delete jobs of this kind in the Prinect Manager if the option is not enabled.
See also "JDF Communication" tab.
A folder structure lets you give your job list a clearer overview by linking a predefined structure of the job list to the JDF import. This is where you can create folder structures for different workflow profiles.
Set up a folder structure
Select profiles
You can click the "+" sign to select more workflow profiles if you wish to enable and set up the folder structure for other workflow profiles, with the exception of the MIS connection. See Select profiles.
"Job Location" list box
The JDF Connector data are managed below the job location, by default below the "PTJobData\Jobs" folder. The "Job Location" list box displays if at least one additional job location is set up. You then select the job location in this box that is affected by the folder structure.
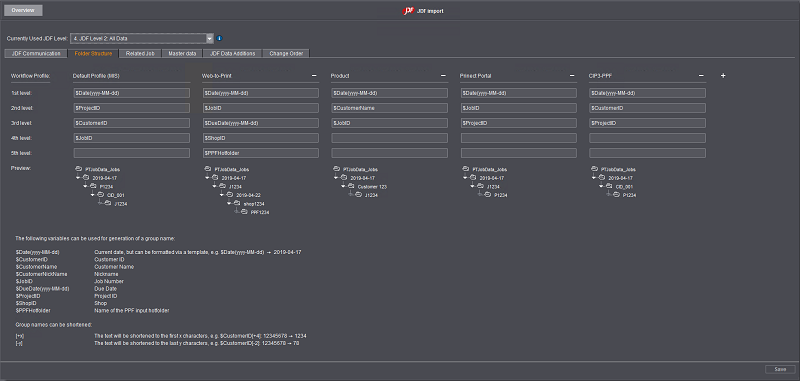
Levels of the folder structure
For each enabled profile, enter the structure variables you want in levels 1 to 5.

Note: We recommend that you mark (click with the mouse) the structure variables you want (with prefixed dollar sign) from the description in the lower part of the window, copy them with command key + C and paste them into the text box with command key + V. In this way, typing errors can be avoided.
You can also add one or several letters as prefix in a text box to tag or distinguish the respective folders.
You must always enter a variable for the first level. Levels 2 thru 5 are optional. The impact of the folder structure on the job list depends on the workflow profile through which the jobs are imported.
The levels later represent a folder structure in the job list. You can find out which folder structures are possible in the description in the lower part of the window.
"Preview" gives you an instant overview of the new folder structure in the job list after the entries have been made. However, you must have grouped the job list in "Jobs" by the "Job group" column (see Grouping the job list).
Click "Apply" once you have finished all your entries.

Note: Configuration of the folder structure only impacts newly imported jobs.

Note: This is where you can also define one or more storage folders for gang layouts that are generated by Prinect Signa Station. Select the "SignaStation" profile for this.
You can find more information in: "Folder Structure" Tab.
The options in this tab are relevant only for repeat jobs and preliminary jobs that are generated by the MIS and imported to the Prinect Manager.
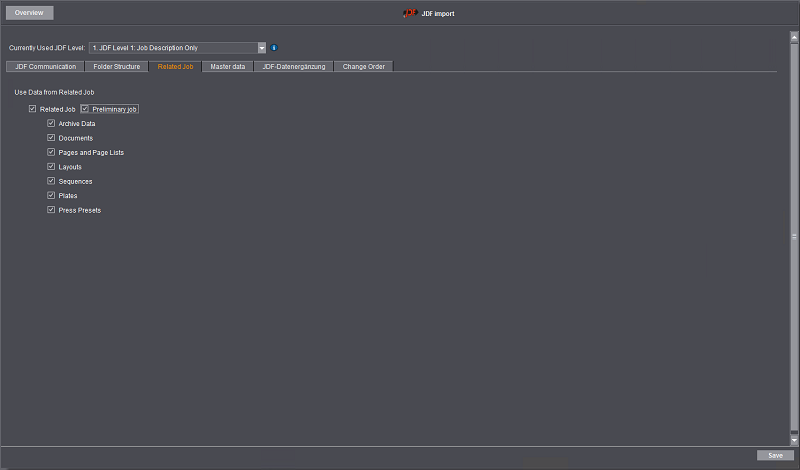
"Related Job" option
You can use this option to define whether data from a predecessor job will be copied automatically to the new job (repeat job). When the option is enabled, the data checkmarked below it are copied automatically to the repeat job.
You can copy the following data:
•Archive files,
•Documents,
•Pages and page lists
•Layouts
•Sequences
•Plates
•Press Presets
You can find more information in: "Related Job" Tab.
"Preliminary job" option
This option lets you define whether data from a preliminary job will be copied automatically to the "real" job.
A preliminary job is a job that was created by the customer of a print shop and whose uploaded PDF data have already been checked (preflight). Customers can create jobs of this kind in the Prinect Portal using the "Files and Approvals" widget if they have the permission to do so. When the print shop creates a job with the same Customer Job ID and same Customer ID in the Business Manager or another MIS, the data are copied from the preliminary job to the real job and the preliminary job is deleted.
This is where you configure the master data transfer from a job added to the Master Data Store (MDS) via JDF import.
Select profiles
With the exception of the MIS connection, you can select other workflow profiles by clicking "Select Profiles" if you wish to enable and set up the master data transfer for other workflow profiles. See Select profiles.
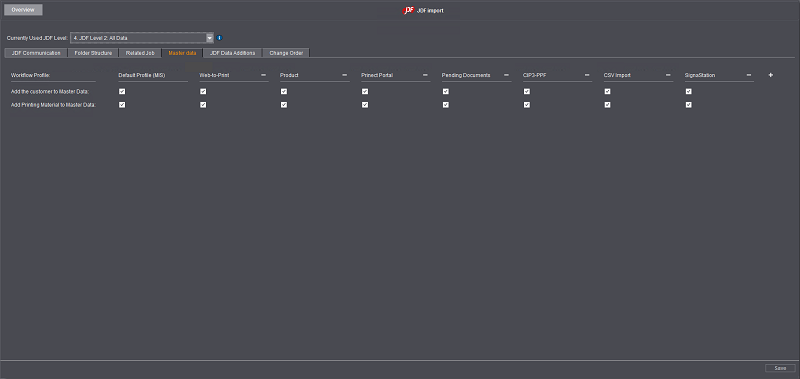
Options for "Add the customer to Master Data"
When this option is enabled, customer data is transferred automatically from the MIS to the MDS if the customer is not yet available in the MDS. See Import Master Data from a Job to the MDS

Note: If a customer is registered in the MDS and if this customer (perhaps with less customer data) is in a print job coming from the MIS, the customer data of the MIS are added automatically to the customer data of the print job.
"Add Printing Material to Master Data" options
When these options are enabled, printing material data for the respective profiles is written automatically from a job to the MDS if the printing material is not yet available in the MDS. See Import Master Data from a Job to the MDS.
You can find more information in: "Master data" Tab.
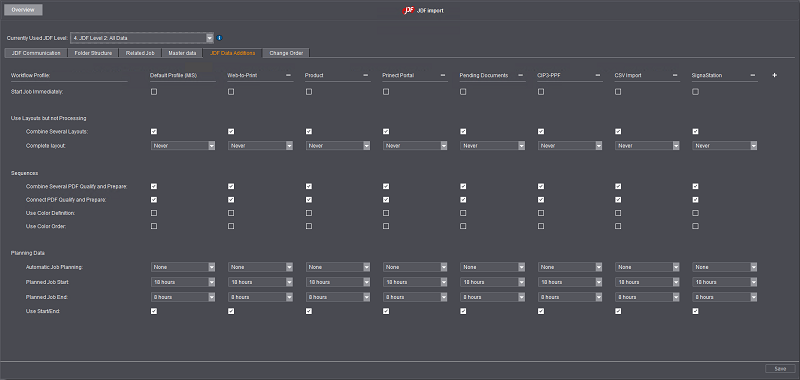
In this tab, the JDF files generated by the MIS are customized before they are transferred to the Prinect Manager. This where you can have JDF data imported into the Prinect Manager edited and/or supplemented to optimally match the data to Prinect Manager processes if needed.

Caution: Make changes in this tab only following consultation with your project manager. A configuration that is not suitable can give you unwanted print results.
Select profiles
You can click the "+" sign to select more workflow profiles if you wish to enable and set up JDF data additions for other workflow profiles, with the exception of the MIS connection. See Select profiles.
You can find more information in: "JDF Data Additions" Tab.
In this tab, you set up how orders with changes made in the MIS will be imported to the Prinect Manager.
The Prinect Manager automatically detects any changes in an existing order made by a Management Information System (MIS). The job data already entered is compared against the new job data here.
In the "Change Order" tab, you can set whether changes to the order by the MIS will be applied automatically or not.
Depending on the set JDF level, different import settings are offered:
Level 1:

The delivery quantity and the delivery date are applied automatically, but no detailed configuration is offered.
Level 2:
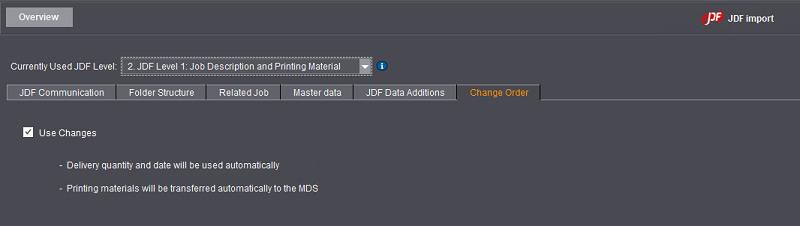
In addition to Level 1, printing materials are also copied automatically to the MDS.
Level 3:
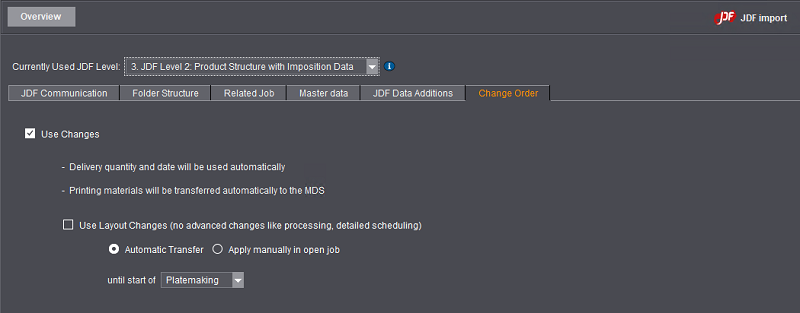
In addition to Level 2, layouts can be applied automatically or manually. Advanced changes like processing or detailed scheduling are not applied.
The type of transfer (manual or automatic) and the latest time it will be done ("until start of" list box) are determined by the layout to prevent inconsistent changes.
Level 4:

In addition to Level 3, all advanced changes like processing, colors, machines and process dates are applied automatically or manually. If desired, detailed scheduling can also be applied.
You can find more information in: Change Orders with MIS.