In the "Image" tab, you can add images that are available as PDFs or JPGs. Like barcodes and text placeholders, these can be placed dynamically.
Select the image source. Then click the preview and drag it to the position you want. You can view the pixel width and height as well as the resolution of the image in the Info window.
|
|
There is also a video on this topic: Dynamic placement of images with the Barcode & VDP Editor. Overview of all video tutorials: Prinect Video Tutorials PDF Toolbox. |
Image source
Select the file location of the image or the variable images.
Variable images are not a good idea for iVDP Labelfire because the greater amount of calculation slows down the speed. See Difference between PDF/VT and iVDP. For that reason, these options are dimmed for iVDP.
•File Path from Placeholder File (not for iVDP)
Select this option if the images are filed in a CSV file. This location is selected in the "Placeholders" tab. You can also specify a root path if the file paths in the CSV file are incomplete, in other words, they only have the file name, for example.
•Images from Folder (not for iVDP)
Select this option if the images are saved in a folder. Only the image files may be found in this folder. The images are inserted in alphabetical order..
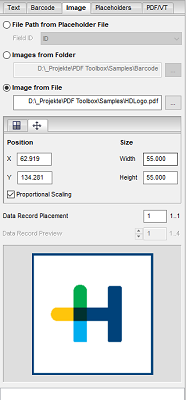
•Image from File
Select this option if you wish to insert a specific image. Set the image path in this box.
Data Record Placement (not for iVDP)
This is where you can assign the data record if you have several placeholders of the same kind on one page. First, type the number of the data record and then click the placeholder. See also Data Record Placement (not for iVDP).
Data Record Preview
If you have variable images you can toggle between the images with "Data Record Preview".
This subtab allows you to generate numerous designs with little effort.
For this purpose, tiles are cut out of a larger image. A data set with the set number of tiles is created from a picture. They can be varied further by rotation, mirroring and an offset in X and Y. A tile is randomly selected for each data record and randomly rotated or mirrored.
X / Y
Here, you enter the number of parts in which the image should be split in the X and Y directions.
For example, if you have an image that has 20 adjacent tiles in 4 rows and 5 columns, type "5" for X and "4" for Y. You will then receive a data set with 20 random tiles from one image.
Offset
This is where you specify the percentage by which a tile can be offset at random. The default setting of 100% will not result in any offset. 10%, for example, will displace the image at random by steps of 10, which allows for many variations and will generate an appropriately larger data record. The smaller the percentage, the more variations are possible.
The offset can be applied only if the value for X or Y is greater than 1 because displacing the image area is possible only then.
Rotate
Select this option if you want to rotate the tiles in 90° increments. The rotation happens at random.
When rotation is enabled, the data set size increases by a factor of 4 (0°, 90°, 180°, or 270°).
Mirror
Select this option if you want the tiles to be also mirrored horizontally or vertically. The mirroring happens at random.
When mirroring is enabled, the data set size increases by a factor of 3 (none, horizontal or vertical mirroring).
You can customize the position and size also by entering numerical values into the appropriate boxes. Enable "Proportional Scaling" to leave the ratio of length to width as it is.
You can specify the reference point for the position coordinates in the toolbar. See Reference point for Dimensioning.