![]()
Open the "Object Editor" by clicking the icon shown to the left or selecting "Plug-Ins > Prinect > PDF Toolbox > Object Editor..." in the menu.
|
|
Open the "Object Editor" by clicking the icon shown to the left or selecting "Plug-Ins > Prinect > PDF Toolbox > Object Editor..." in the menu. |
The "Object Editor" shows you the various properties of placed elements and you can modify them accordingly. You need a separate license.
The "Object Editor" has three tabs. A button bar was also implemented along the bottom of all the tabs to provide direct operation:
|
|
Undo last step. |
|
|
Redo.
|
|
|
To create a rectangle with rounded corners, click this button while holding down the Shift key. A dialog displays where you can enter the settings for the corner shape. You can set a fixed value between 0.1 and 9999 mm for the radius or a relative radius between 0.1% and 50%.
You create a square if you hold down the Shift key while drawing the rectangle. If an image object is selected, it is clipped to a rectangle.
|
|
|
Create ellipse. You create a circle by holding down the Shift key at the same time. If an image object is selected, it is clipped to an ellipse. |
|
|
Edit the path or (if an image object is selected) create a clip path. For details, see: Editing the path with the Path Editor.
|
|
|
Select all objects. |
|
|
Select all objects with same color as marked object. |
|
|
Select all objects with same type as marked object.
For text objects only: |
|
|
Select text block. |
|
|
Select text line. |
|
|
Select all text with same font type as marked text. |
|
|
Select all text with same font size type as marked text.
|
|
|
Take color value from document. |
|
|
Use colors for "Fill" and "Margin" of the marked object. |
|
|
Create a PDF file with the marked objects. |
These buttons reflect for the most part the functions in the context menu (select the object and right-click):
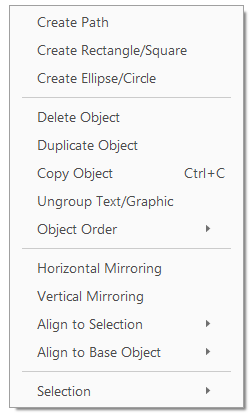
The edit options open to you vary depending on the object selected (graphic, image, text).
This tool has the following tabs:
•Points to note about operation
For notes on operation, see More Details.