
Configuration of job-relevant attributes
This is where you configure the master data transfer from a job to the Master Data Store (MDS) and the master data transfer from the MDS to a job.

Note: The transfer of master data from a job to the MDS is possible only in a JDF workflow.
The "Transfer of printing material data to master data" option
When this option is enabled, printing material data are written automatically from a job to the MDS if the printing material is not yet available in the MDS. See Writing master data into MDS from an imported job.
The "Transfer of printing material data to the job" option
When this option is enabled, the printing material data of a job are supplemented automatically by the printing material data from the MDS. See Adding master data to a job
The "Transfer of customer data to master data" option
When this option is enabled, customers are written automatically to the MDS if the customer is not yet available in the MDS. See Writing master data into MDS from an imported job
"E-mail address of approver is transferred to job" option
When this option is enabled, the e-mail address of the approver is copied automatically from the MDS to a job provided that the approver is known in the MDS. See also How do I define one or more approvers in the jobs (JDF file)?.
"Define contact person as approver" option
When this option is enabled, the contact from the Management Information System is created automatically as the approver in the MDS. However, this is the case only if the customer is not yet available in the MDS. See also How do I define one or more approvers in the jobs (JDF file)?.
"Customer identification by means of the customer ID only"
With this option enabled, the MDS approvers are added to the job if the customer IDs match. With this option disabled, the MDS approvers are added to the job only if the customer ID and customer name match. See also How do I define one or more approvers in the jobs (JDF file)?.
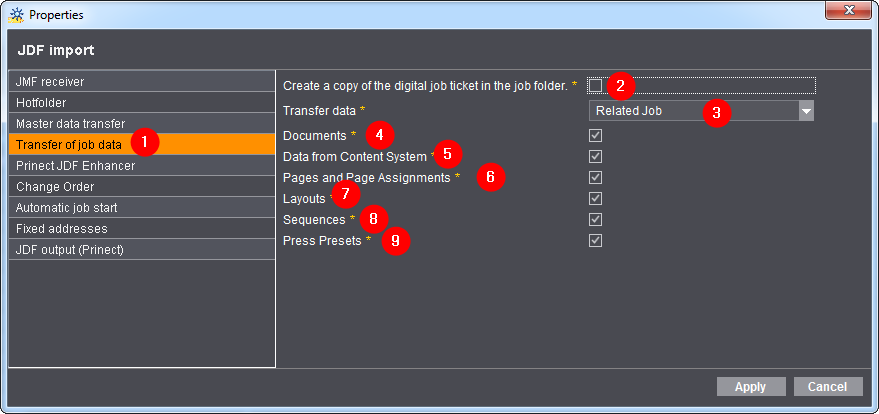
"Create a copy of the digital job ticket in the job folder" option
You can use this option (2) to save a copy of the HTML job ticket, e.g. as generated by Prinect Prinance, in the job home on the Prinect Pressroom Manager/Prinect Integration Manager. This option has to be activated only if you cannot access the directory in which Prinect Prinance locally saves the HTML job file via the Prinect Pressroom Manager/Prinect Integration Manager server.
You can view the job ticket of a job on the Prinect Pressroom Manager/Prinect Integration Manager only if you have access to the HTML job ticket.
"Transfer data" option
This option (3) is significant only for repeat jobs that are generated by your Management Information System and imported into the Prinect Integration Manager. You can use this option to define whether data (4) will be copied automatically to the new job (repeat job) from a previous job or preliminary job (Remote Access job).
The prerequisite for automatic acceptance of data from the previous job is that the Prinect Integration Manager automatically "recognizes" a job as a repeat job. A repeat job is recognized in the Prinect Integration Manager based on the "Related JobId" attribute, which the imported job must include.
Your Management Information System must therefore "write" the "Related JobId" attribute in the job when the job is generated. You can generate a repeat job in Prinect Prinance by copying an existing job, for example.
Whether and which data of the previous or preliminary job (Remote Access job) is accepted depends on what you configure. Configuration for automatic or manual data acceptance is described in detail in the section Repeat Jobs.
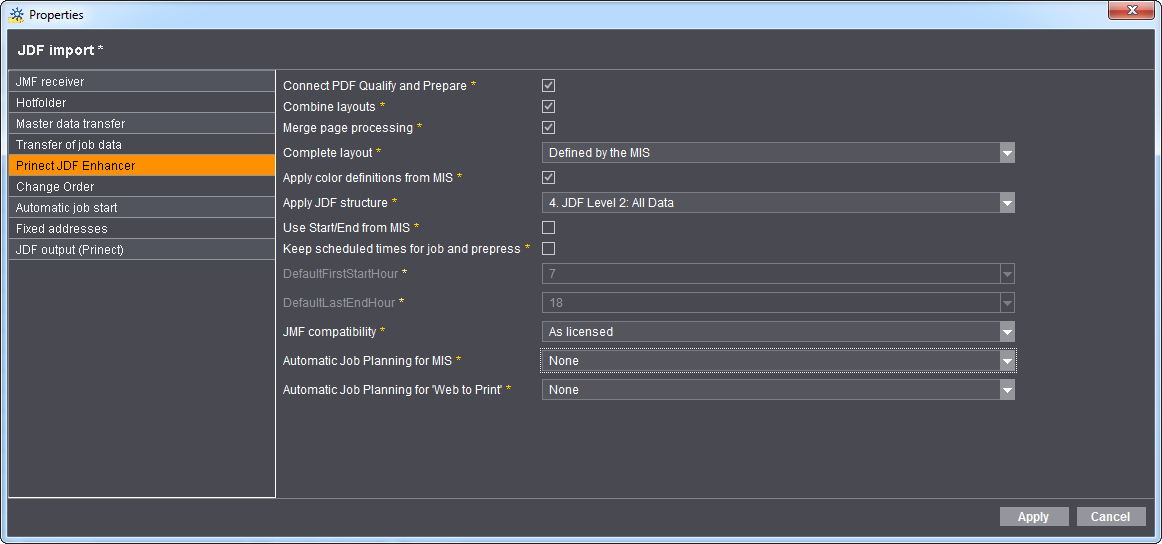
The settings in "Prinect JDF Enhancer" match the JDF files generated by your MIS before they are transferred to the Prinect Cockpit. This makes sure that the data in the JDF files match your workflows in your shop.
Make changes in the Prinect JDF Enhancer only following consultation with your project manager. A configuration that is not suitable can give you unwanted print results.
The "Connect PDF Qualify and Prepare" option
This option is relevant only for a Prinect Prepress Manager.
Most JDFs have a "PrepressPreparation" gray box. The Prinect Prepress Manager uses this to create the "Qualify" and "Prepare" sequences. The two sequences are linked together when you enable "Connect PDF Qualify and Prepare", and all documents added to the job are processed automatically by both sequences.
If the option is disabled, the Cockpit user must submit all documents manually to the Prepare sequence after processing by the Qualify sequence.
The "Combine layouts" option
The Prinect workflow is optimized to use one overall layout to describe the end product. Some MIS write separate layouts to a JDF file, for example, a layout for the cover of a booklet and a layout for the body.
When this option is enabled, the separate layouts are combined for further processing. The option has no effect if it is enabled and there is already one overall layout. We recommend that you enable the option.
The "Merge page processing" option
This option is relevant only for a Prinect Prepress Manager.
Some MIS create several page lists for the parts of a layout. For example, an MIS can create a page list for the cover of a booklet and a page list for the body. Furthermore, the JDF may contain several "PrepressPreparation" gray boxes and the Prinect Prepress Manager may create several "Qualify" and "Prepare" sequences.
When the option is enabled, the Prinect Prepress Manager creates only one "Qualify" sequence and one "Prepare" sequence.
If the option is disabled, the Cockpit user must decide each time when adding documents which sequences will be used.
"Complete layout" option
This option is relevant only for a Prinect Prepress Manager.
•"Never"
The layout is not completed automatically by the Signa server.
This is the default at the start of a project. We recommend that you leave this as it is until you have optimally matched the configuration of your MIS and your interactive Prinect Signa Station.
•"Always"
This setting starts the Signa server of the Prinect Integration Manager. The Signa server automatically creates a complete layout based on the data from the MIS.
•"Defined by the MIS"
"Apply ink definitions from MIS" option
This option applies the colors defined in the MIS during import. For example, you are calculating a brochure with a cover and a body. The cover contains six colors and the body four colors. Below we shall briefly describe the effects of the option on this brochure.
•This option was activated.
If the option is activated, these colors are used in the imported job and taken into account during processing. However, in this case the prepress system must use the exact same colors (color names). If this is not the case, processing of the job may stop until all colors specified by the MIS are taken into account,
•The option was deactivated.
If the option is disabled, all colors are copied to the imported job as possible colors. This means that six colors will also be used for the body, although only four colors were actually calculated for it.
You will know which colors are finally assigned when the pages or page list are assigned to the layout. You will see the correct colors used after you assigned the body pages to the press sheets for the body.
"Apply JDF structure" option

Note: Only the "Job description only" item is licensed by default. If you select a different entry, e.g. "All data", you must have acquired and registered the corresponding license. You can check this in the License Manager. A warning displays in the message window if the appropriate license is missing.
•"Job description only"
Only administrative job data are used when this option is enabled. This includes job number, job name, customer data, delivery date, delivery quantity of the end product and comments (job description and URL to job description). If it is a repeat job, the job number of the predecessor job is also used.
•"Job description and printing material"
This option lets you use the printing material data from the MIS in addition to the data from "Job description only". However, these data are not sent automatically to Prinect Signa Station and must be assigned manually.
•"Product structure with imposition information"
This option lets you use the same data as in "Job description and printing material". In addition, the layout data (including printing material data) are sent from the MIS. These data are available directly when working with the interactive Prinect Signa Station. A layout is created automatically from these data when the Signa server is active.
•"All data"
This option lets you take all existing data from the MIS. Suitable layouts and process networks are created for standardized production jobs based on these data.

Note: Depending on the job structure used in your company, there will be a certain number of jobs where you will have to manually adapt the automatically created layout and the process network. Qualification of standard jobs and exceptions is done in the project.
"Use start/end from MIS" option
When you enable this option, the scheduled production dates are taken from the MIS for the start and end of the production steps, provided that the MIS wrote them to the JDF file.

Note: The MIS will and may only send the start and end times of the production steps if detailed scheduling is active in the MIS. The times specified by the MIS are sent as far as the machines when used in conjunction with "Keep scheduled times for job and prepress". Because scheduled times are frequently changed in the MIS, make sure that scheduled times are applied automatically to the order changes! See "Change Order" item.
If the Prinect Scheduler is used, consult your project manager about use of the two options.
"Keep scheduled times for job and prepress" option
When this option is enabled, rough planning of the times is sent from the MIS to the Prinect Integration Manager. This means that the earliest start date scheduled will be applied and is a suggestion for forward scheduling in the Scheduler.

Note: This option must also be enabled in conjunction with "Use start/end from MIS".
"Split/WorkAndBackPlannedDurations" option
When this option is enabled, the times scheduled for a front and back job are halved. The setting depends on the connected MIS and is done by your project manager.
Background: Some MIS define only the total duration for processing front and back and not the single times for each print run. In this case, you must enable the option because the Prinect Scheduler would plan double the time if you don't.
"DefaultFirstStartHour" option
This option is active only if "Keep scheduled times for job and prepress" is enabled. The time entered here is suggested as the start time (e.g. for forward scheduling) in the Scheduler. This is relevant for the Prinect Prinance MIS, for example, because this MIS always suggests 12:00 hrs as the default.
"DefaultLastEndHour" option
This option is active only if "Keep scheduled times for job and prepress" is enabled. The time entered here is suggested as the end time in the Scheduler. This is relevant for the Prinect Prinance MIS, for example. because this MIS always suggests 12:00 hrs as the default.
"JMF compatibility" option
This setting is responsible for sending status messages from the Prinect Integration Manager to the MIS. Status messages are dynamic messages that are sent by the machine. These include actions (PDC messages) that the machine operator triggers.
The option you select depends on the MIS that you use. In general, you should define these settings only following consultation with your project manager.
•"As licensed"
This is the default setting. When this option is enabled, the JMF messages sent depend on your license. In some cases, messages can be incorrect. For this reason, you should set this with your project manager before the first JMF messages.
•"MIS JMF P2010 (3rd party MIS)"
This option is required for only certain MIS connections. Set this option only following consultation with your project manager.
•"MIS JMF P2011 (Prinect Business Manager, 3rd party MIS)"
Generally, this option should be selected for all MIS.
"Automatic Job Planning for MIS" option
This option is active only if "Complete layout" is set to "Always" or "Defined by the MIS". This means that the Signa server is active and, accordingly, there is a layout.
•"None"
With this option, calculations for quantities and processes are run based on the data from the MIS.
We recommend that you generally select this option. Only following consultation with your project manager should you define a different setting for this option.
•"Amounts"
If you select this option, quantities are calculated based on the machine data from the CDM. Select this option only following consultation with your project manager.
•"Quantities and Processes"
If you select this option, quantities and processes are calculated based on the machine data from the CDM. Select this option only following consultation with your project manager.
"Automatic Job Planning for Web to Print" option
Contrary to an MIS, Web-to-Print generally cannot provide you with a clean process network and calculation of quantities. In this case, it is advisable to have quantities and processes calculated by the Prinect Integration Manager.
•"None"
With this option, calculations for quantities and processes are run based on the data from the Web-to-Print.
•"Amounts"
If you select this option, quantities are calculated based on the machine data from the CDM.
•"Quantities and Processes"
If you select this option, quantities and processes are calculated based on the machine data from the CDM. Because Web-to-Print generally is not capable of supplying you with this information, we recommend that you select this option.
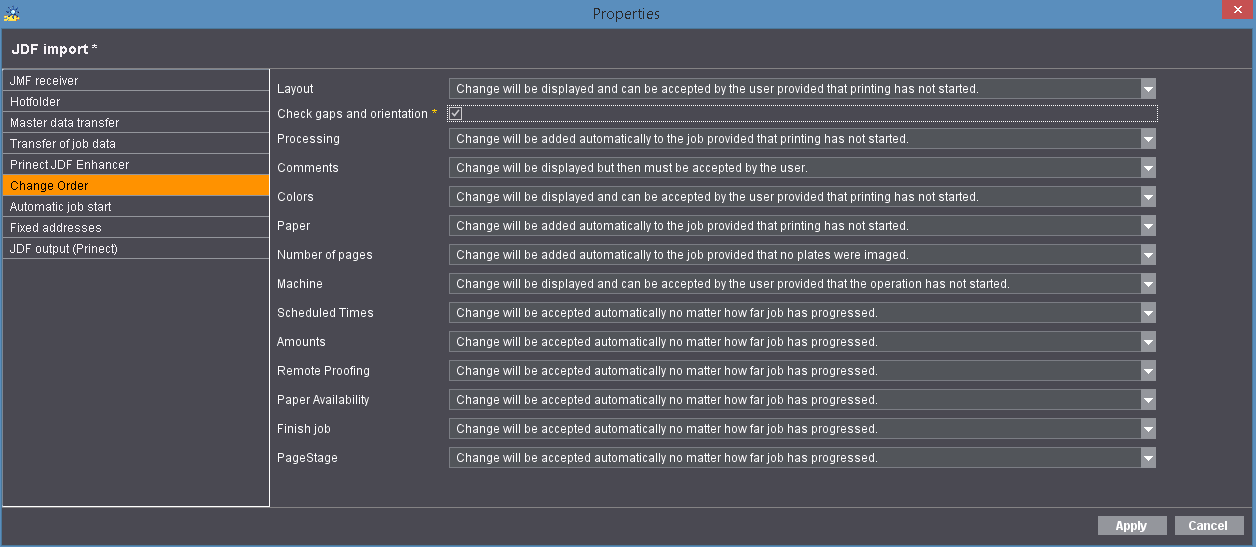
The Prinect Integration Manager/Prinect Pressroom Manager automatically detects any order changes in a job made by a Management Information System. The job data already entered is compared against the new job data here.
In "Change Order", you can configure for each of the large number of possible order changes (see graphic above) in the JDF import properties whether a "Change Order" request is adopted/accepted or rejected by the Management Information System (MIS) and define the boundary conditions. You can find a detailed description of order changes in the section Change Orders with MIS.
Possible order changes
Layout
The following changes result in changes to a layout:
•Change sheet list (add, rename or remove sheets)
•Change page size
•Change folding type
•Change language
Layout changes are closely related to other changes. For example, deletion of a sheet brings about a change in the layout and a change in processing-
For that reason, each of the change items must match each other when configured.

Caution: Manual changes to a layout can be lost when you accept layout changes from the MIS.
In this case, we recommend that you make changes to the layout manually and do not accept the layout changes.
Check gaps and orientation
Some MIS are capable of transmitting gaps and orientation in the layout without any faults. When this option is enabled, the gaps sent by the MIS and orientation are checked and applied to the layout.
Processing
This setting is needed only if you take all the data from the JDF structure (setting: "JDF import > Prinect JDF Enhancer > Apply JDF structure > 4. All data")
The following changes result in changes to processing:
•Add, rename and remove sequences and operations
Processing is closely related to the layout. For that reason, we recommend that you coordinate configuration of the layout change and the processing change.
Comments
Changes to comments are generally not an issue and can be applied automatically.
Colors
Changes to colors from the MIS works only semi-automatically. This means that the Cockpit user must still edit the colors manually in the Cockpit after the changes are applied.
Paper
Depending on the configuration of Change Order, changes to paper works only semi-automatically. This means that paper changes are active only when you open the layout in Prinect Signa Station after the change and output it to the Cockpit.
Page total
The page total is closely related to the layout. For that reason, we recommend that you coordinate configuration of the layout change and the page total change.
Machine
This setting is needed only if you take all the data from the JDF structure (setting: "JDF import > Prinect JDF Enhancer > Apply JDF structure > 4. All data").
Changes to the machine work only semi-automatically. This means that the Cockpit user must still edit the machine sequences manually in the Cockpit after the changes are accepted.
Scheduled times
The scheduled times change, for example, if there are changes to quantities and colors and if there is a change in the page total.
The scheduled times from the Scheduler are overwritten if you use scheduled times from the MIS. You must make the change manually in the Scheduler if you do not wish to take the scheduled times from the MIS.
Amounts
Changes to quantities depend to a certain extent on the scheduled times. If you accept quantities but not scheduled times, there are discrepancies in the Scheduler because the scheduled times are not recalculated there.
Remote proofing
In Prinect, it is possible to have the pages, the sheet and the plates approved through the MIS. The sequences must be configured accordingly. For example, the "Plate Approval" option must be checked for plate approval in the "ImpositionOutput" sequence.
Paper Availability
Paper availability displays whether paper is ordered, supplied or available. This data about the material generally comes from the MIS and can be transferred for planning in the Prinect Integration Manager.
Close Job
Some MIS can set a job to 'finished' after the invoice is issued and send this information to the Prinect Integration Manager.
Options for order changes
"Change will not be displayed and not be accepted"
This option is generally selected as the default. Change Order is disabled.
"Change will be displayed and can be accepted by the user provided that no plates were imaged"
If relevant changes were made before the plates were imaged, a note about job changes displays in the job list and in the open job. The user must accept the change before it is applied. You will find details about how to accept a change in Accept/reject order changes manually.
"Change will be displayed and can be accepted by the user provided that printing has not started"
If relevant changes were made before printing, a note about job changes displays in the job list and in the open job. The user must accept the change before it is applied. You will find details about how to accept a change in Accept/reject order changes manually.
"Change will be added automatically to the job provided that no plates were imaged"
If relevant changes were made before the plates were imaged, the changes are applied automatically and the user does not have to accept them first. However, to keep the user informed about the change, a warning about job changes displays in the job list and in the open job. This warning disappears only when the message was marked as "Read". You will find details about how to mark a change as "Read" in Mark a Change Order as "read".
"Change will be added automatically to the job provided that printing has not started"
If relevant changes were made before printing, the changes are applied automatically and the user does not have to accept them first. However, to keep the user informed about the change, a warning about job changes displays in the job list and in the open job. This warning disappears only when the message was marked as "Read". You will find details about how to mark a change as "Read" in Mark a Change Order as "read".
Change will be accepted automatically no matter how far job has progressed"
If relevant changes were made, the changes are applied automatically and the user does not have to accept them first. However, to keep the user informed about the change, a warning about job changes displays in the job list and in the open job. This warning disappears only when the message was marked as "Read". You will find details about how to mark a change as "Read" in Mark a Change Order as "read".
"Change will be added automatically to the job if no process is active"
This option is available only for the "Finish job" change. When you select this option, a job is finished only after all scheduled processes are completed.
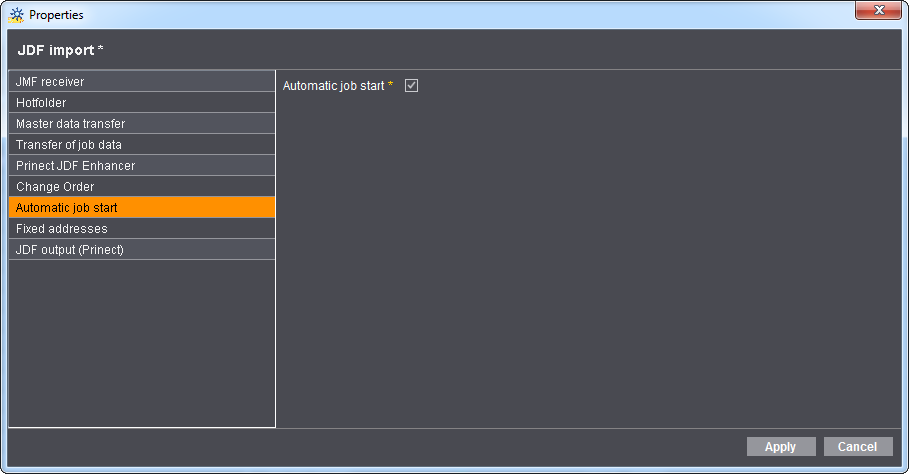
The following setting should be made for a JDF-PPF workflow:
Disable the "Automatic job start" option ("manual job processing") here and enable "Autostart" ("automatic job processing") in the PPF import configuration.
This way, the job data can be processed until the PPF/CIP3 files have been imported from the prepress system. Job processing then starts and you cannot make any more changes. Please read the section Configuration of the job list for this purpose.
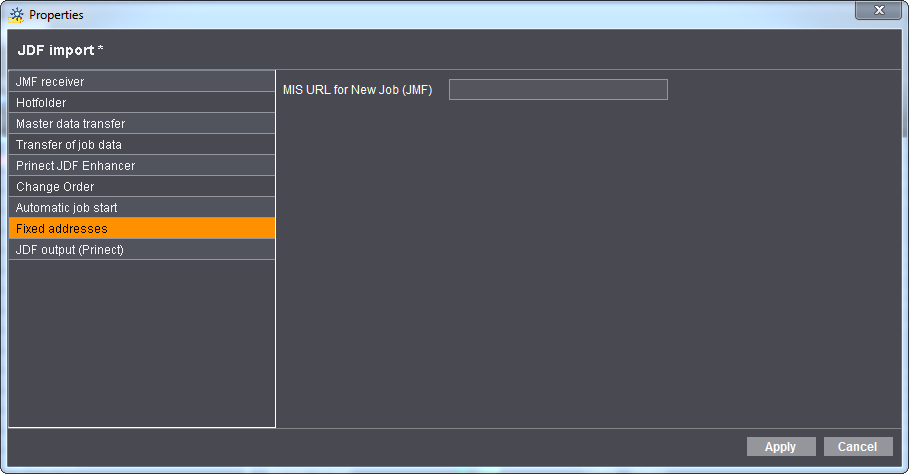
You must only enter data in the following cases:
1.You are using a third-party Management Information System. In this case, make any changes only following consultation with your project manager.
2.You wish to connect the Prinect Web-to-Print Manager to the Prinect Business Manager.
In this case, you must enter the address of the Prinect Business Manager server, including the JMF port in this section. The default port is "18326".
Example of address: http://heipc95031v:18326 (server=heipc95031v, port=18326)
The Prinect Integration Manager "knows" from this address where to take the job numbers from the Prinect Business Manager.
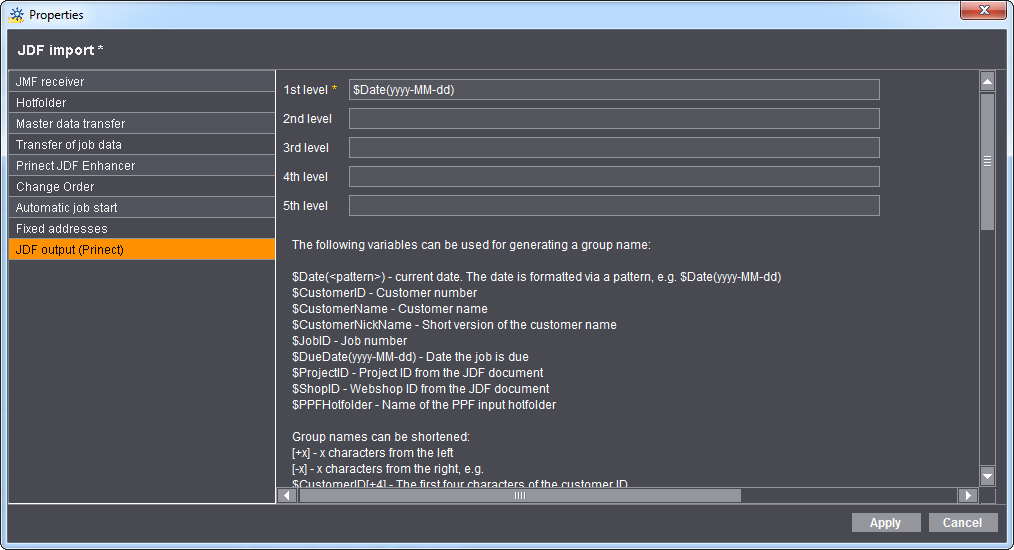
This option lets you give a clearer structure to the job list. Configuration of the job list is described in detail in Configuration of the job list.