 Prerequisite: Follow the checklist before starting an update. See Checklist Before Starting an Update.
 Note: In addition to a system upgrade, product updates may also be available. You can install the system upgrade together with the product updates, or you can deactivate individual product updates that are not urgent at present and install them later. See Perform a product update.
A system upgrade is an upgrade to the master version of a Prinect software, which means that not only individual components are updated, but a completely new version of the software is installed. See Versions.
A system upgrade takes a lot of time during which the system is not available for production. Therefore, you should schedule the system upgrade carefully for a time slot when there are no urgent production jobs.
Note: To keep production downtimes due to a system upgrade as short as possible, you can resort to the following options:
•If the workflow system comprises subsystems, you can update the subsystems and the main system at different times. You can restore dissolved subsystems if there are any. See Dissolve or restore subsystems.
•If there are movable computers in the system, you can create a custom group and move the movable computers to this group for the time being. After the system upgrade is complete, you can move the movable computers back to the original system and upgrade the system again later. Only the mobile computers will then be updated in this second run. See Create a custom group.
If a system upgrade is available, a corresponding banner appears in the detail area where you can start the Installation Assistant. In addition, the banner shows which system upgrade was performed last.
System Upgrade Order for Server — Client Computers
It is essential to follow the order described below if you are upgrading a system simultaneously on a Prinect Server computer and on client computers (Cockpit workstations):
1.First, the server must be updated.
2.The client computers are updated only then.
If you do not follow this order, a warning message is displayed.
The reason is that communication between the client and the server must be compatible. The following principle applies:
•An older Cockpit can communicate easily with a newer server, but
•A newer Cockpit cannot communicate with an older server. This will cause communication with the older server to fail until the server is also updated.
Installation using the System Upgrade Wizard
When you click a computer in the navigation pane, a check for updates to this computer is made first. This may take a (short) while. If a system upgrade is available, the following is displayed in the detail area:
Note: A system upgrade is displayed as "available" in the detail area only if all installation files required for the upgrade were downloaded and are ready for installation in the local PMC Repository.
Install system upgrade and product updates together
1.To start the system upgrade, click "Start Assistant". The System upgrade assistant will guide you through the upgrade process.
2.First, an information window appears:

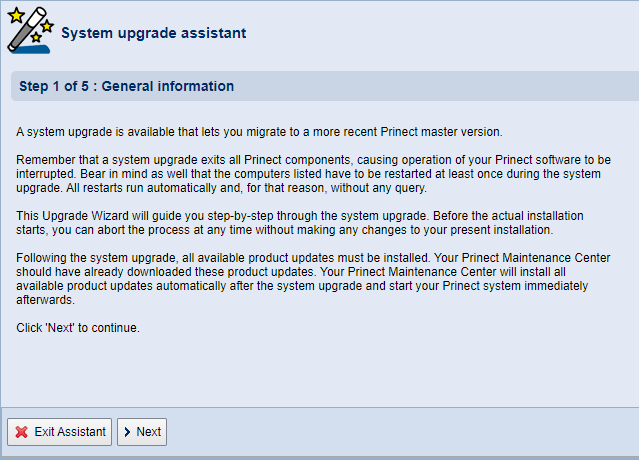
3.Click "Next". A check is now performed whether all computers involved are reachable, which software version is available on the computers, and whether operating system updates or restarts are pending on one or more of the computers to be updated.
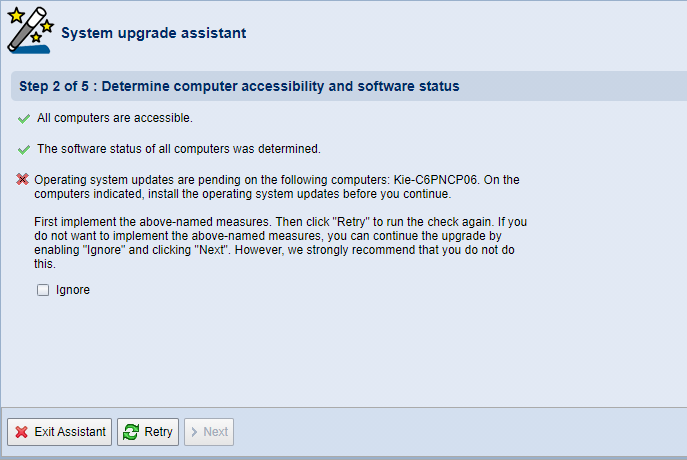
4.If this is the case, as shown in the example, it is recommended that you run the pending operating system updates before proceeding with the assistant. This ensures that the operating system version is compatible with the updated Prinect version and that the latest security updates are installed. If you need to continue the Prinect system upgrade immediately due to time constraints,you can enable the Ignore option and continue the upgrade process by clicking Next.
Otherwise, install the operating system updates displayed on the computers, and then reboot the computer if necessary. Then click "Retry" in the System upgrade assistant of the PMC. The next step is to check for pending operating system updates again.
Click "Next".
Now the accessibility of all computers involved is checked and the hardware and operating system details are determined.
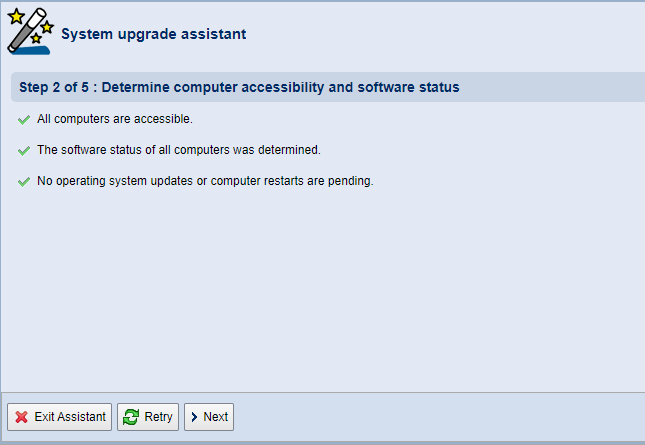
5.Click "Next".
Select System Upgrade: If multiple system upgrades are available, you must select the system upgrade you want.
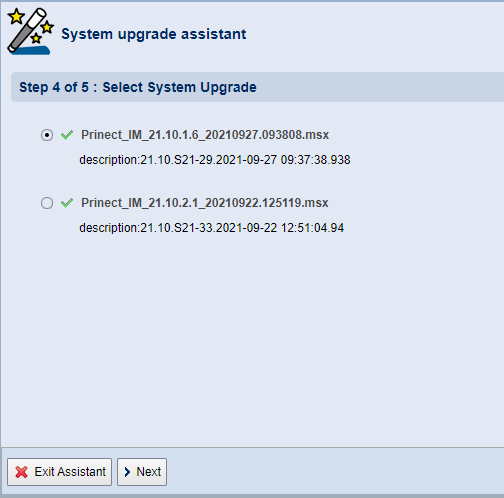
6.Click "Next".
The safety precautions that must be taken prior to installation are now displayed in the form of a checklist. See also Checklist Before Starting an Update.
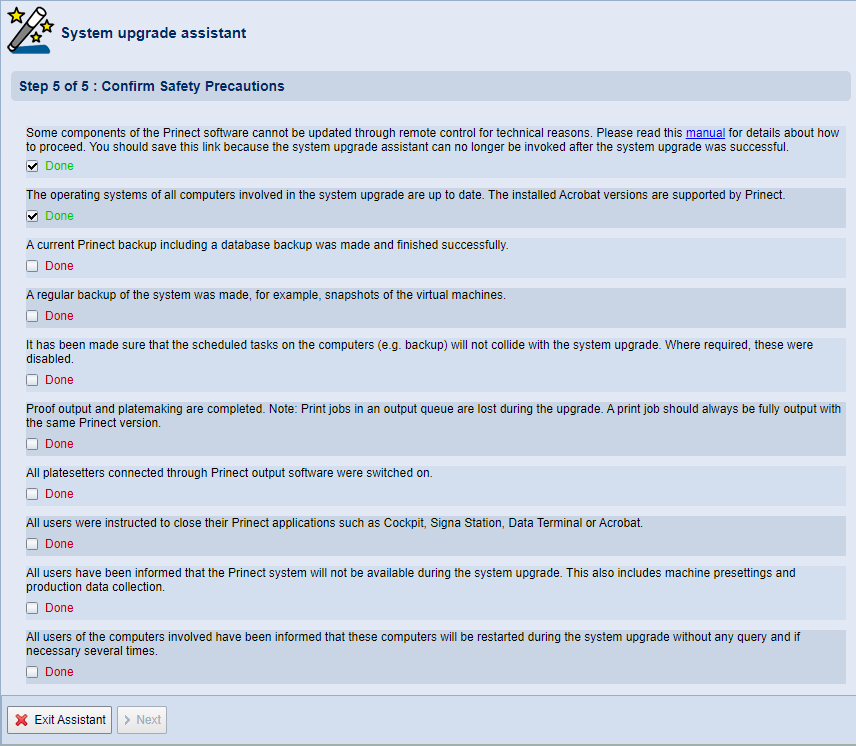
You must confirm all items in the checklist by checking the "Done" option.
7.Click "Next".
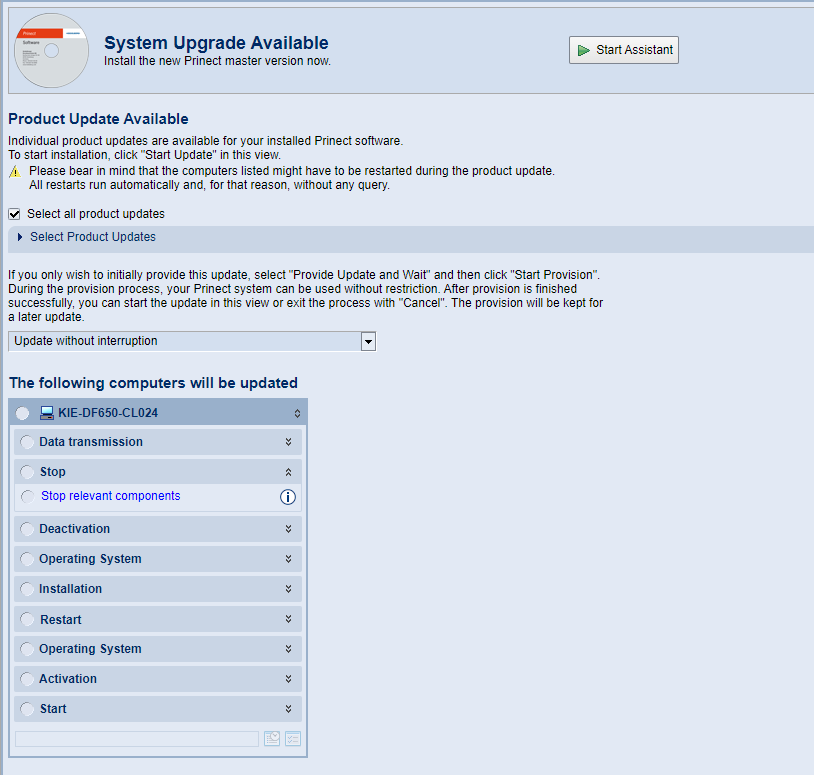
Now configure the upgrade process:
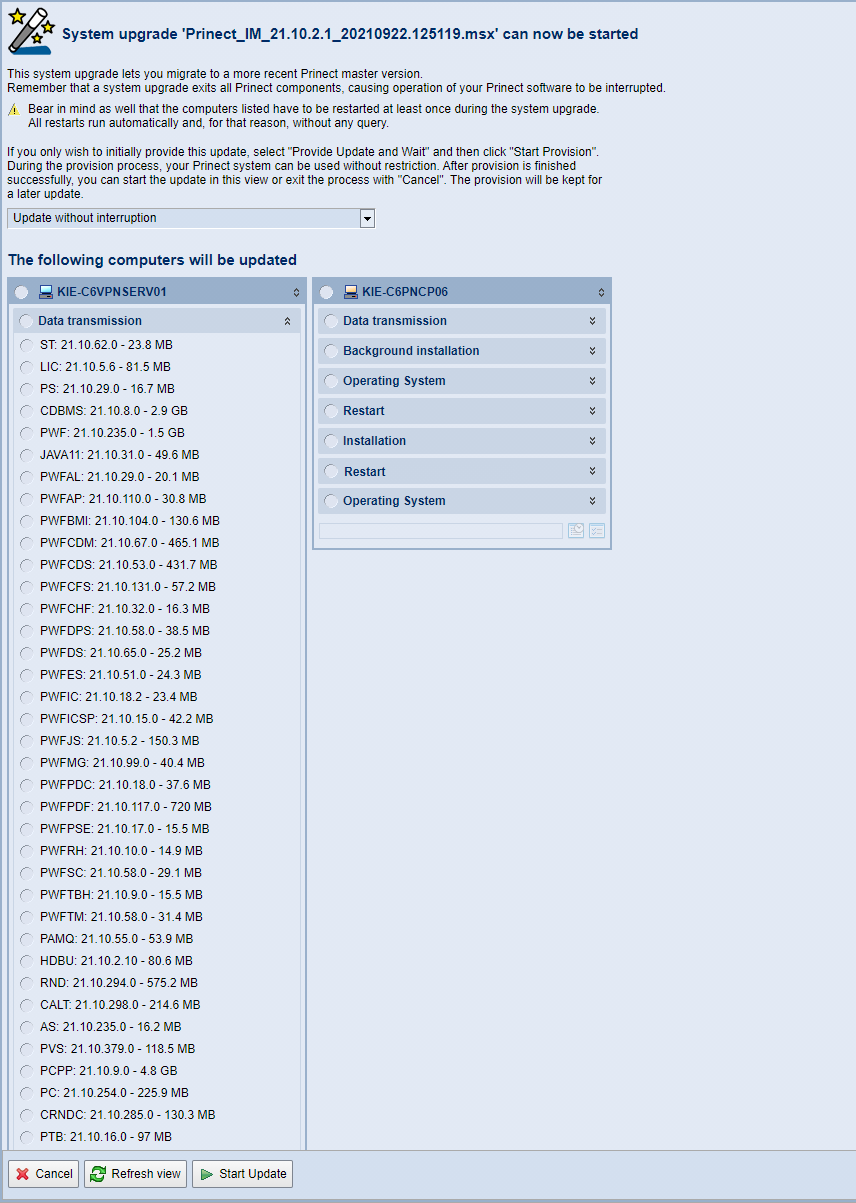
This view shows the available update packages for each computer to be updated. The example shows a system consisting of a Prinect Production Server and a Cockpit client. The headings (darker background) show the individual steps of the update in the order (from top to bottom) in which the installation will take place. A complete installation step is indicated by a green dot in front of the entry.
Use the drop-down list above "The following computers will be updated" and choose one of the options to control how the system upgrade is performed:
•Update without interruption (default):
Click "Start Update" to start the update; it will continue to run without interruption until all update processes are complete.
•Provide Update and Wait:
The individual update packages are provided for installation on the participating computers, i.e. the update packages are transferred from the PMC Repository to the computers in question after all necessary validations (check installer signature and disk space). The start will take place at a later time and must be triggered manually. For this purpose, a corresponding start button is displayed when the package is fully available. This option allows you to continue working on the Prinect computers while the installation data is being transferred. Background installations are also performed and started immediately.
•Provide update and start it automatically at a configurable time:
The individual update packages are provided for installation on the participating computers. Below this drop-down list, boxes appear where you can set the date and the time. This is where you specify when installation is to start automatically.
Note: When selecting these options, keep in mind that the participating computers must be rebooted at least once during the update.
8.Click "Start Update".
The HEIDELBERG License Agreement appears first:
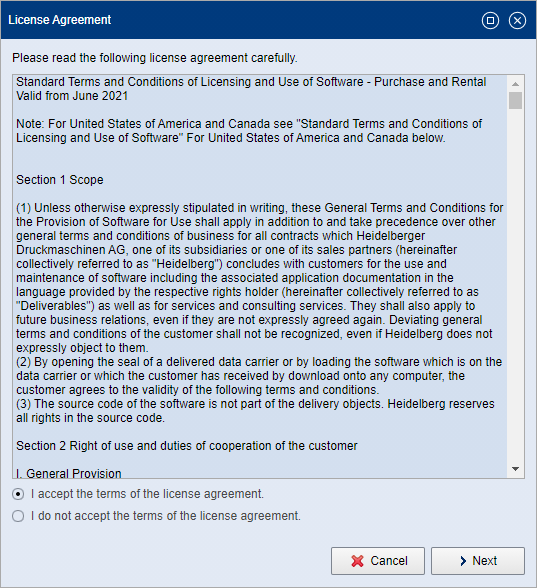
Read the License Agreement carefully. To be able to continue the setup, you must accept the agreement by enabling the "I accept the terms of the license agreement" option.
9.Then click "Next".
Depending on the type of upgrade packages, a dialog with hints may appear:
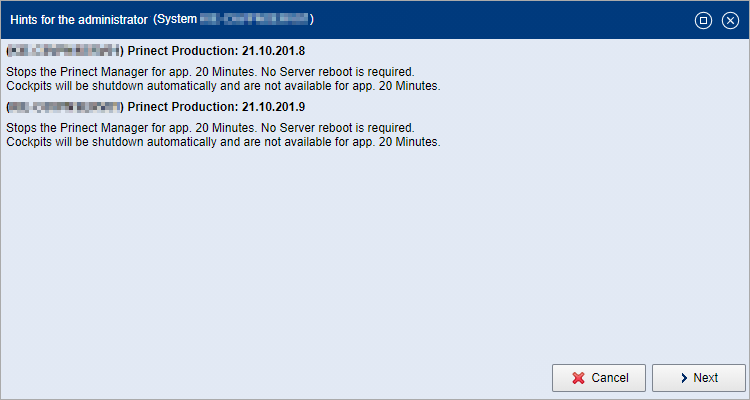
Confirm with "Next".
10.An authentication is needed now:
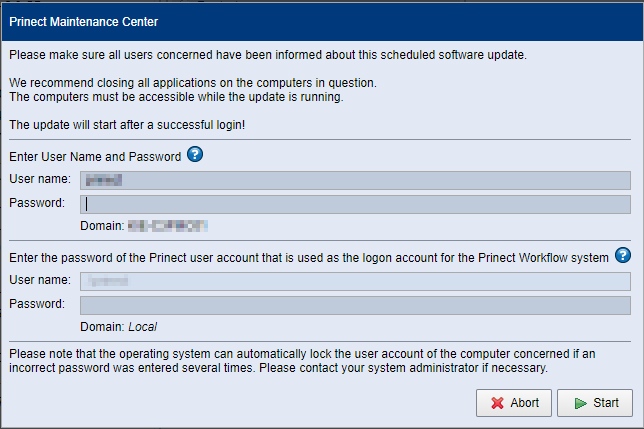
•Enter username and password in the fields above to log in to the Prinect Maintenance Center.
•If you are updating a Prinect Production Server (a Prinect workflow system) or a Prinect Digital Server, as in the example, enter the login data for the Prinect (Windows) user account specified during initial installation of the Prinect Production software in the fields below. The Prinect user account is not a user account set up in the Prinect user management (Cockpit > Administration > Users)! Normally, the username is preset, i.e. you then only need to enter the password.
Note: In exceptional cases, the name of the Prinect user account on the target computer is unknown to the PMC. In this case, the "User name" box can be edited, and you have to specify the name of the Prinect user account here.
11.Clicking "Start" starts the actual update process or makes the update data available for later installation.
Note: Depending on the installation scope, the installation process that starts now can take some time unless the installation type "Provide Update and Wait" or "Provide update and start it automatically at a configurable time" was selected. The assistant does not respond while updating is in progress. Depending on which update is performed, a reboot of the involved computers may be triggered in the course of the update.
If the "Provide Update and Wait" option was selected when configuring the upgrade process, a button is displayed that allows you to start the installation process.
12.Wait for all update phases to complete. If this is the case, the "Finish Operation" button turns operable. Complete the system upgrade process by clicking this button. A second internal check whether all update phases have been successful is performed.
The computers involved will be released for future installations only when the installation process is complete. If an installation process has not been completed, the computer is in the state "running installation" and is blocked for further updates.
If one or more component(s) could not be started during installation, a message is displayed:
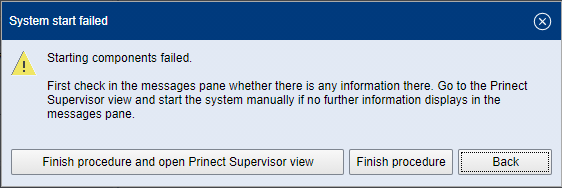
You can now do the following:
•Finish procedure and open Prinect Supervisor view:
The Supervisor view of the respective computer appears. Here you can check the health of all components and try to start the system by clicking the "Start" button.
•Finish procedure:
The procedure is finished even though at least one component is not started.
•Back:
The window closes. This will not complete the installation process! For example, you can now reboot the affected computer if the stopped component does not start in Supervisor view.
Note: A message indicates the reason why an update is not offered or cannot be installed. For example, a certain Prinect module cannot be installed because the required version of Prinect Renderer is not available in on the target system. Information on these cross-dependencies is available in the "Loaded Software" window. See The "Loaded Software" window.
Installation processes comprise several phases. The following example explains some of the possible installation phases:
Data transmission | The installation files are transferred to the respective computer(s). |
Preparation | Computers connected to updated Prinect computers, for example, computers with installed Prinect Signa Station software, are prepared for installation. |
Stop | If the computer on which the update is taking place has a Supervisor Master, this installation phase stops all Prinect components on that computer and on all connected client computers. |
Deactivation | The Supervisor service is set to "manual" in this phase. This ensures that the Prinect components are not started automatically during installation. |
Background installation | Background installations are performed. See Background installations without restricting the system availability |
Operating system | The ability to run operating system updates is temporarily disabled on the respective computer. This ensures that Prinect installations can take place without operating system updates being run or launched at the same time. |
Restart | In this initial restart phase, the computer reboot ensures that any running processes or access to network drives that could interfere with the installation are terminated prior to starting the installation phase. This also flushes temporary memory regions. The restart prior to the start of the installation phase always takes place during upgrade installations. |
Installation | Installation is taking place. |
Restart | This restart phase only takes place if the newly installed software requires a restart after installation. This type of restart always takes place — if requested — after an update installation. |
Operating system | In this phase, the ability to perform operating system updates is reactivated. |
Activation | The Supervisor service is changed back to "automatic", so that the components can be restarted by the Supervisor. |
Start | The Prinect components are started. |
Prinect System Software Version
The banners indicating that a system upgrade or cumulative update is available show the most recently installed version of each update:

Multiple system upgrades or cumulative updates may also be shown here; this is the case if two system computers have different system upgrade or cumulative update versions. Such situations can occur, for example, after a system restructuring.
Privacy Policy | Imprint | Prinect Know How | Prinect Release Notes