The user interface of Signa Station was designed to give you the best possible overview of the system at all times. A "flat" hierarchy was therefore selected for the displayed elements, in which – wherever possible – there are no overlapping windows. Things can quickly get muddled, especially when several dialog boxes, perhaps even overlapping each other, are open at the same time. The user interface was therefore designed in such a way that all important settings can be made in the main windows of the application.
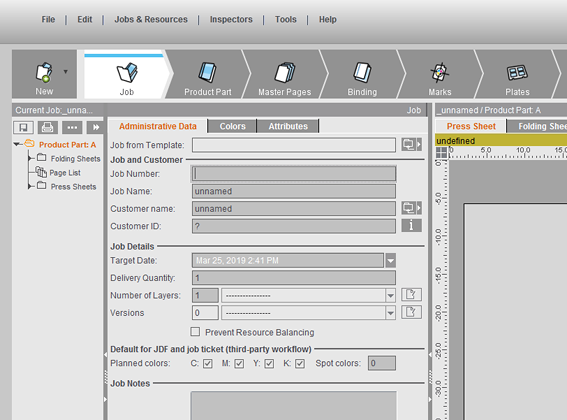
The user interface can be viewed in three different designs. You can select the one you want in the Preferences in the "General > Color Scheme" tab (see Color Scheme). You must restart Signa Station after having made your changes.
Color scheme 1:
Color scheme 2:
Color scheme 3:

Note: We recommend that you use a second monitor to have a clearer view of your work. You should display the "detached" graphic window on this monitor. Operation: "Tools > Detach/Include Graphic View..."
Structure of the User Interface
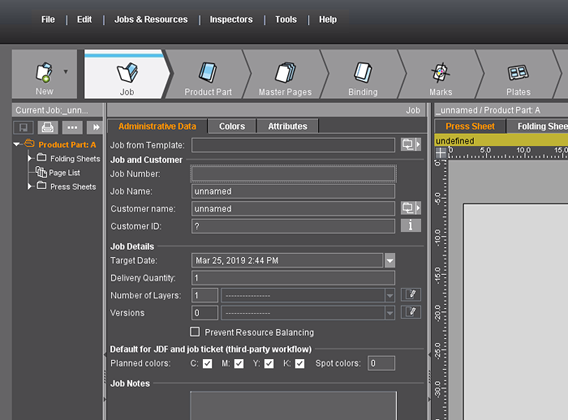
The user interface of the Signa Station consists of "static" and "dynamic" elements. The static elements are always visible while the dynamic elements can change their appearance and contents depending on the operational process that is currently in progress.
Signa Station has four dynamic basic windows that appear when a job is open, showing the data about it.
In addition, there is also the dynamic workflow bar that always can be seen and that matches its steps automatically to the selected job or work mode. Only the steps needed for the job display.
You can resize each of the windows to suit your needs, see Keyboard Shortcuts.
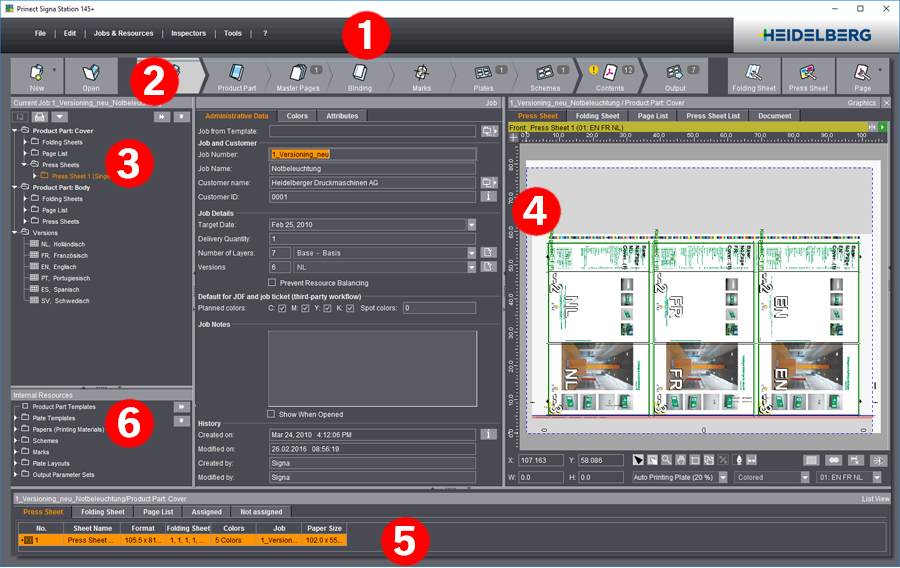
The user interface has one static element:
•the menu bar (1)
More details about the menu bar can be found in the Signa Station Menus.
The user interface has the following dynamic elements:
•the workflow bar (2) with the selected step and related workspace (2). You can find more details about the workflow bar in this chapter in Workflow bar.
•the Browser window (3) and "Internal Resources" (6)
For more information about the Browser window, see the Browser Window .
•the graphic window (4)
For more information about the graphic window, see the Graphic Window .
•the list window (5)
For more information about the list window, see the List Window .
A menu bar with the "File, "Edit", "Jobs & Resources", "Inspectors", "Tools" and "? (Help)" menus is located at the top of the GUI. The functions listed in these menus are static (exception: "Jobs & Resources") and can be selected at any time you are processing the job.
The "Jobs & Resources" menu displays the currently open jobs and you can enable them for editing by selecting them.

You will find a description of the menus in the menu bar in the chapter Signa Station Menus.
The structure of the workflow bar reflects the procedure in creating a job in a print shop and the bar displayed is dynamic. The various steps are shown accordingly.
In the versions preceding Signa Station 2016, the elements (product parts, documents, plates, pages, etc.) of the job you wanted to create were the structural features of the user interface. Most of these elements were integrated into the Job Assistant and their structures also set up there. However, when a job was created, it was difficult to find the various elements in the user interface.
This changed as of version 2016. All procedures with the required elements were integrated into the workflow bar and now can be found on the top level of the user interface. You now can see at all times at what point in the job you are.

Note: The "Job", "Contents" and "Output" steps refer to the entire job while all other steps reflect the settings of the product part selected in the Browser window on the left.
This is important only if you have several product parts in a job. You can ignore it if you have just one product part in your job.
The open or new job is available for editing directly, without you having to invoke the Job Assistant as in earlier versions.
The workflow bar is the control element in the user interface and lets you edit an open and active job in a fast and easy manner.
You can start other important and frequently used functions with a click.

At the beginning and end of the workflow bar, there are buttons that you can use to open and create other jobs and display various inspectors. You can switch between the resources view and the job view (using shortcut "Alt + 1" and "Alt + 0"). More details can be found in the "Resources and Machines" chapter, General.
The currently selected inspector is highlighted.
Possible keyboard shortcuts in the workflow bar:
|
Key combinations |
|
|---|---|
|
"Ctrl + 1" |
First step |
|
"Ctrl + +2" |
Last step or product part step selected |
|
"Ctrl + space bar" |
Go forward one step |
|
"Ctrl + Shift key + space bar" |
Go back one step |
|
"Alt + 0" and "Alt + 1" |
Go to the resources view and back to the current job |
Possible steps and order in the workflow bar
Job Data
1.Job
Job (Administrative Data)
Product part data (imposition)
2.Product Part
Product Part
3.Master Pages (not in the "Montage" and "Packaging" work modes)
Master Pages
4.Binding (not in the "Montage" and "Packaging" work modes)
Binding
5.Marks
Marks
6.Plates
Plates
7.Schemes (not in the "Montage" and "Packaging" work modes)
Schemes
Possible product part data depending on selected work mode
8.Assembly Block (only in the "Montage" work mode)
Assembly Block (only in the "Montage" work mode)
9.Packaging (cutting die file) (only in the "Packaging" work mode)
Packaging (only in the "Packaging" work mode and in "Sheet Optimization for Packaging")
10.Article (only in the "Packaging" work mode)
Article (only in the "Packaging" work mode)
11.Optimization (Ganging Optimization)
"Optimization" Step
12.Results (Ganging Optimization)
Results (Gang Job)
13.Versioning (only when working with a version cluster)
See Working with a Version Cluster.
Job Data
14.Contents
Contents
15.Output
Output
Additional data in the various steps

A digit, a line or an exclamation point display in the various steps, indicating that there is additional information.
This gives you an overview of the basic data and contents of a product part at any time, without having to click the step.
The top level of the workflow bar shown above contains the following information about the selected product part:
•the blue lines above the steps indicate that you have already clicked the step,
•an additional special master page is defined,
•a plate template is selected,
•a folding sheet is defined,
•a PDF document is assigned to the job. The "flashing exclamation point" indicates that there are unplaced pages,
•seven press sheets will be output for the job.
A '0' is not displayed.
The following information displays in the steps:
.
|
Steps |
Information |
|---|---|
|
Job |
No additional information |
|
Product Part |
No additional information |
|
Master Pages |
Number of special master pages |
|
Binding |
No additional information |
|
Marks |
No additional information |
|
Plates |
Number of plate templates |
|
Schemes |
Number of folding sheets |
|
Contents |
Number of PDF documents |
|
Output |
Number of press sheets per job |
|
Assembly Block |
Number of assembly blocks |
|
Optimization |
Number of imported gang parts |
|
Packaging |
Number of shapes |
|
Article |
No additional information |
|
Versioning |
Number of version product parts |
The Four Basic Windows Including the Workflow Bar
The four basic windows of Signa Station will now be described.
Workflow bar showing the selected step
The Browser window shows you the open and active job and all of its components. A click on the arrows displays more details in a substructure. When you click the double arrow pointing downwards, all the subfolders below the currently selected folder open at one go. When you click the double arrow pointing right, all the subfolders of the first level close open.

See Browser Window and Functionalities.
The graphic window shows you the elements of a job you selected as a graphic view.
To have a clearer view of your work, you should display the graphic window on a second monitor. Select "Tools > Detach/Include Graphic View" or use the keyboard shortcut "Ctrl + M".
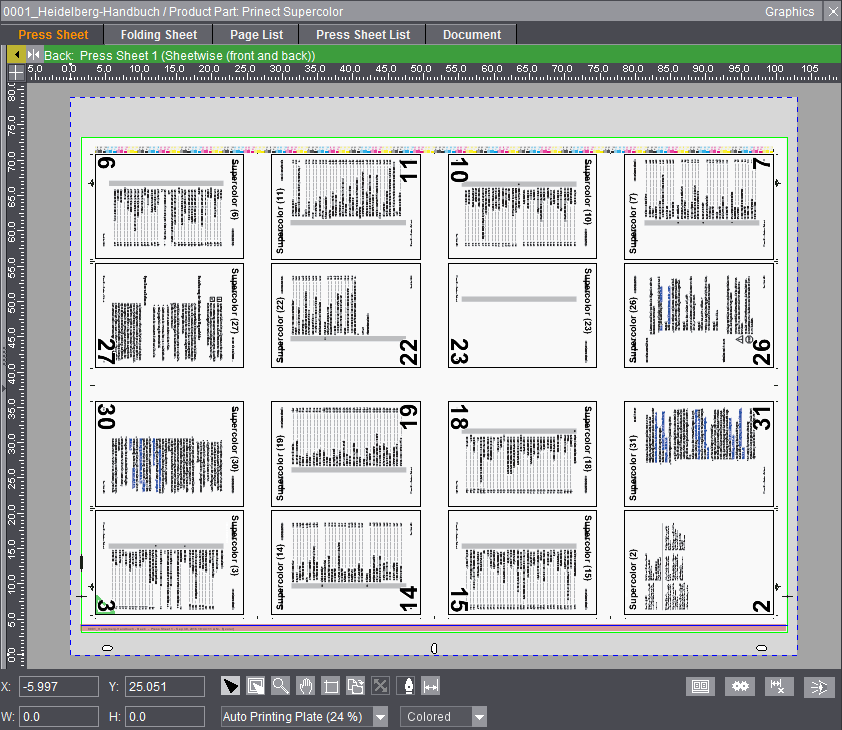
See Graphic Functionality .
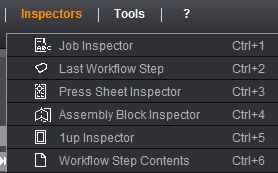
The inspectors window shows you the inspector currently invoked. The settings of the open and active job display.
The caption bar shows the name of the inspector and the focus of the graphic window.
See Where You Can Select Inspectors .
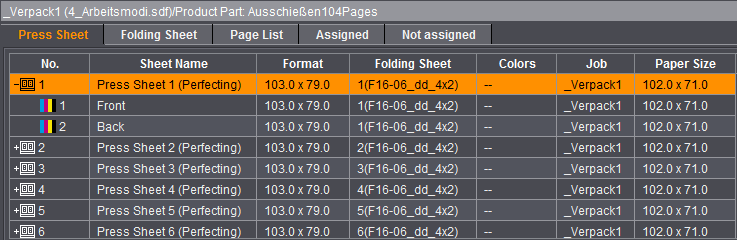
The list window shows you the elements of a selected job as a table.
You can show or hide the list window. To hide the window, select "File > Preferences > User Interface" and disable the "List View" option. You must exit and restart Signa Station.
See List Functionality.
Click a button to trigger an action. A window displays or a function is performed directly.


The folder button opens the file selection dialog, see the File Selection Dialog for Resources.

Folder button with quick selection function
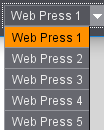
This button also lets you select the most recently used resources or resource groups directly. Click the arrow to display the most recently used resources. You can define the number of menu items in "Preferences > General > Number of Recent Jobs".

This button lets you choose that the function last used stays in the foreground, allowing you to invoke it directly.

You can display different drop-down menus in the menu bar. See Signa Station Menus.
An arrow on a button indicates that the button contains more than one option and that these options are mutually exclusive: it is only possible to select one at a time.
The screen contents vary depending on the tab you click.

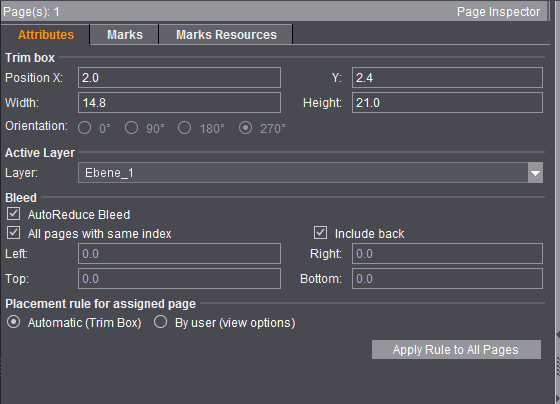
The right arrow means that another section with details (e.g. folder structure) can be opened up. Vice versa, the down arrow means that this section with details can be collapsed again.

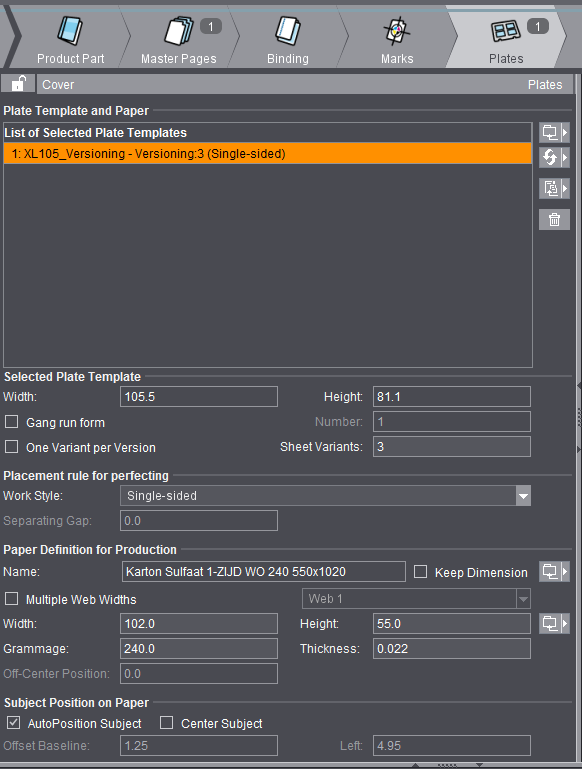
You can select just one of the various options presented, for example, "Automatic", ""By user (view options)". This indicates that a setting is selected.
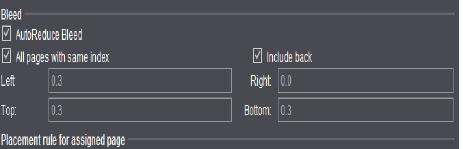
You can select or deselect a function by clicking a check box, for example, "All pages with same index".
Each tool button has a function that you can enable or disable. The button is shown in reverse video when the function is enabled.

There is an "arrow" at the top left of the button that lists the available modes or tools when you right-click it on the PC or use the command key + mouse button on the Macintosh. Select the mode or tool you want. It moves to the top of the list where its function can then be triggered.

Places where you can enter data yourself are highlighted by a lighter background.
•Boxes for linear dimensions:
You can decide whether the data displayed will be with or without a unit of measure in "File > Preferences > General > Units in text boxes".
•Boxes for linear dimensions:
The linear dimension is converted to the default unit of measure if you enter a value in a unit that doesn't correspond to the default one.
•Calculations are possible in a numeric text box (addition, subtraction, multiplication and division).
•Errors: Some boxes have limits. The limit displays if it is exceeded. The box turns red and a beep sounds.
•Accuracy: You can enter numeric values as accurately as you want. The system uses precisely this accuracy internally. In the user interface, however, the values that are displayed are only accurate to approx. 1/100 mm.
File Selection Dialog for Resources
The file selection dialog appears at various points in Signa Station. Variations are possible depending on the resource you selected.
You can find a detailed description of the selection dialog for jobs in File Menu.
The following dialog displays if you want to load a template (e.g. a scheme) to a job:
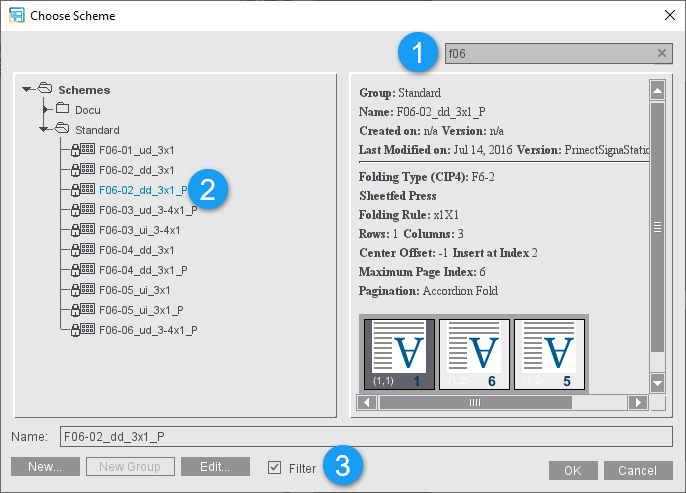
You can then select resources in existing structures and folders. The top folder level displays automatically. This varies according to where you are in the application when you clicked the folder button. Other functionalities will be described below:
By entering a partial string of the resource you are looking for in the search field (1) at the top, you can restrict the display to all resources that contain this string (2) for a better overview. The search is not case-sensitive.
If a filter is active in the resource selection dialog ("Filter" (3) checkbox in the bottom line), the filter and the search text are combined and only the resources meeting both criteria are displayed.
When you click "New" and no resource is selected, a dialog opens where you can create your own "folder" structures.
If a resource is selected, its editor opens showing the defaults.

Note: The "Standard" folder is read-only and for that reason you cannot save one of its resources. Always create your own folder structures.
Creates a new group in the folder structure.
Is enabled when a resource is selected. Click it to open the relevant editor.
When a filter is set, only resources matching the currently open job display.
Applies the selected resource to the job.
Closes the dialog without applying a resource.
The Grouping Table shows the possible settings in a clearly structured list:
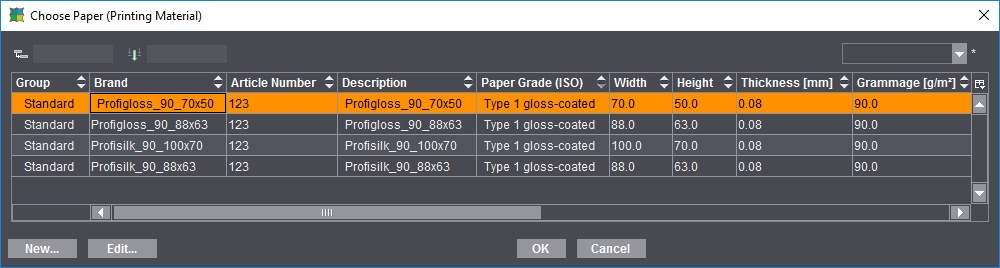
•Drag the heading of a table column to the top left box to group the table items by this column. Click the arrow on the left to open the respective group.
•You can also drag more than one column to the grouping box. This will interconnect the groups in such a way that the second column is displayed as a subset of the first column, etc.
•Dragging a column heading to the right of the two top boxes turns the box into an input box where you can define a text filter.
•To undo grouping and/or the text filter again, drag the item out of the box and back into the table.
•To change the sort order, click the "Up" and "Down" arrows in the column headings.
•Quit the table by clicking the "Cancel" button without accepting the selection, or click "OK" to accept the selection.
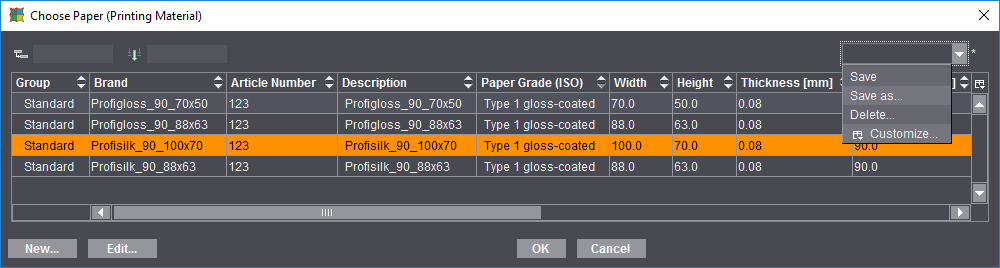
You can customize the table view of the list, i.e. you can hide columns or change the order.
To do so, choose "Customize" in the list box and disable the columns you do not wish to see, or show them again if necessary. Using the buttons to the left, you can move the items up or down and to the top or bottom.
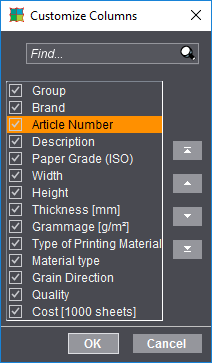
You can save this custom setting and, when required, load it again using the list box.
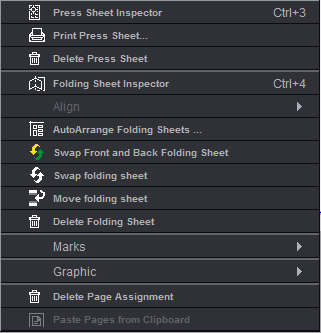
The functions of a context-sensitive menu vary, depending on where you are in the application (for that reason, context).
If you use a mouse with two buttons, click the other mouse button to display the context-sensitive menu. (The right button if you are right-handed, and the left if you are left-handed provided that you reconfigured your mouse buttons.)
With the Macintosh single-button mouse, you display the context-sensitive menu by holding down the Ctrl key at the same time you click with the button.
Below is an example of the context-sensitive menu as it displays in the graphic window in the "Press Sheet" tab with the possible actions for a selected job: